

- B2B Customer -


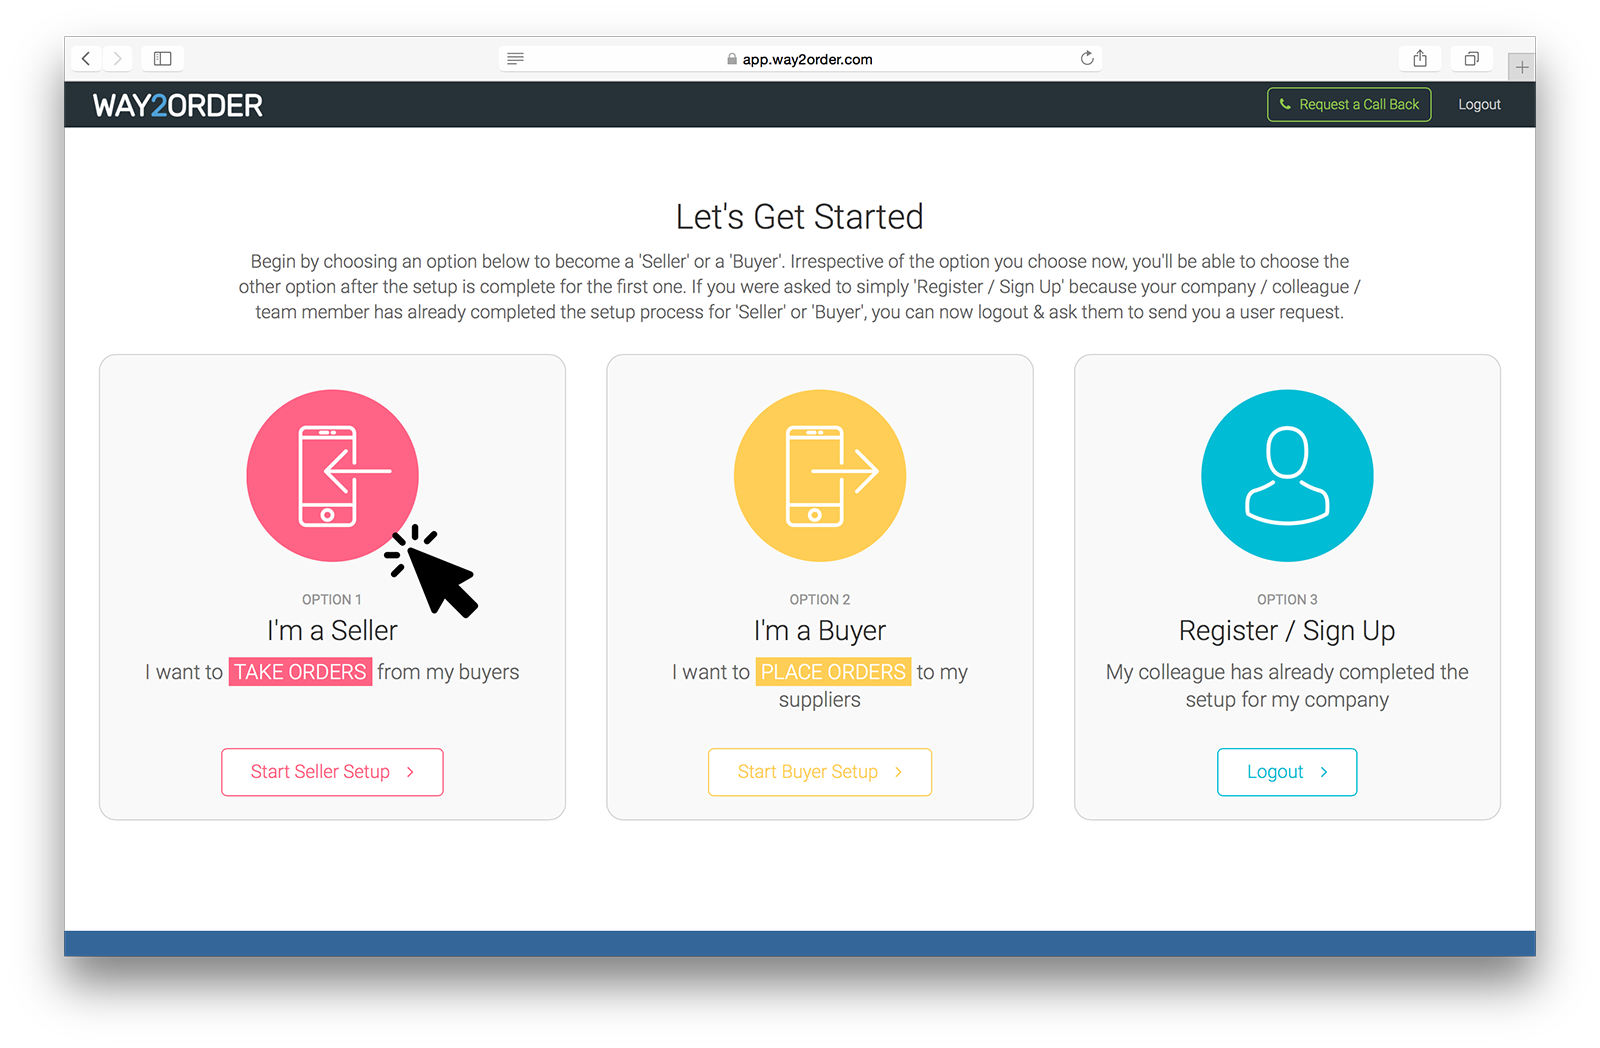
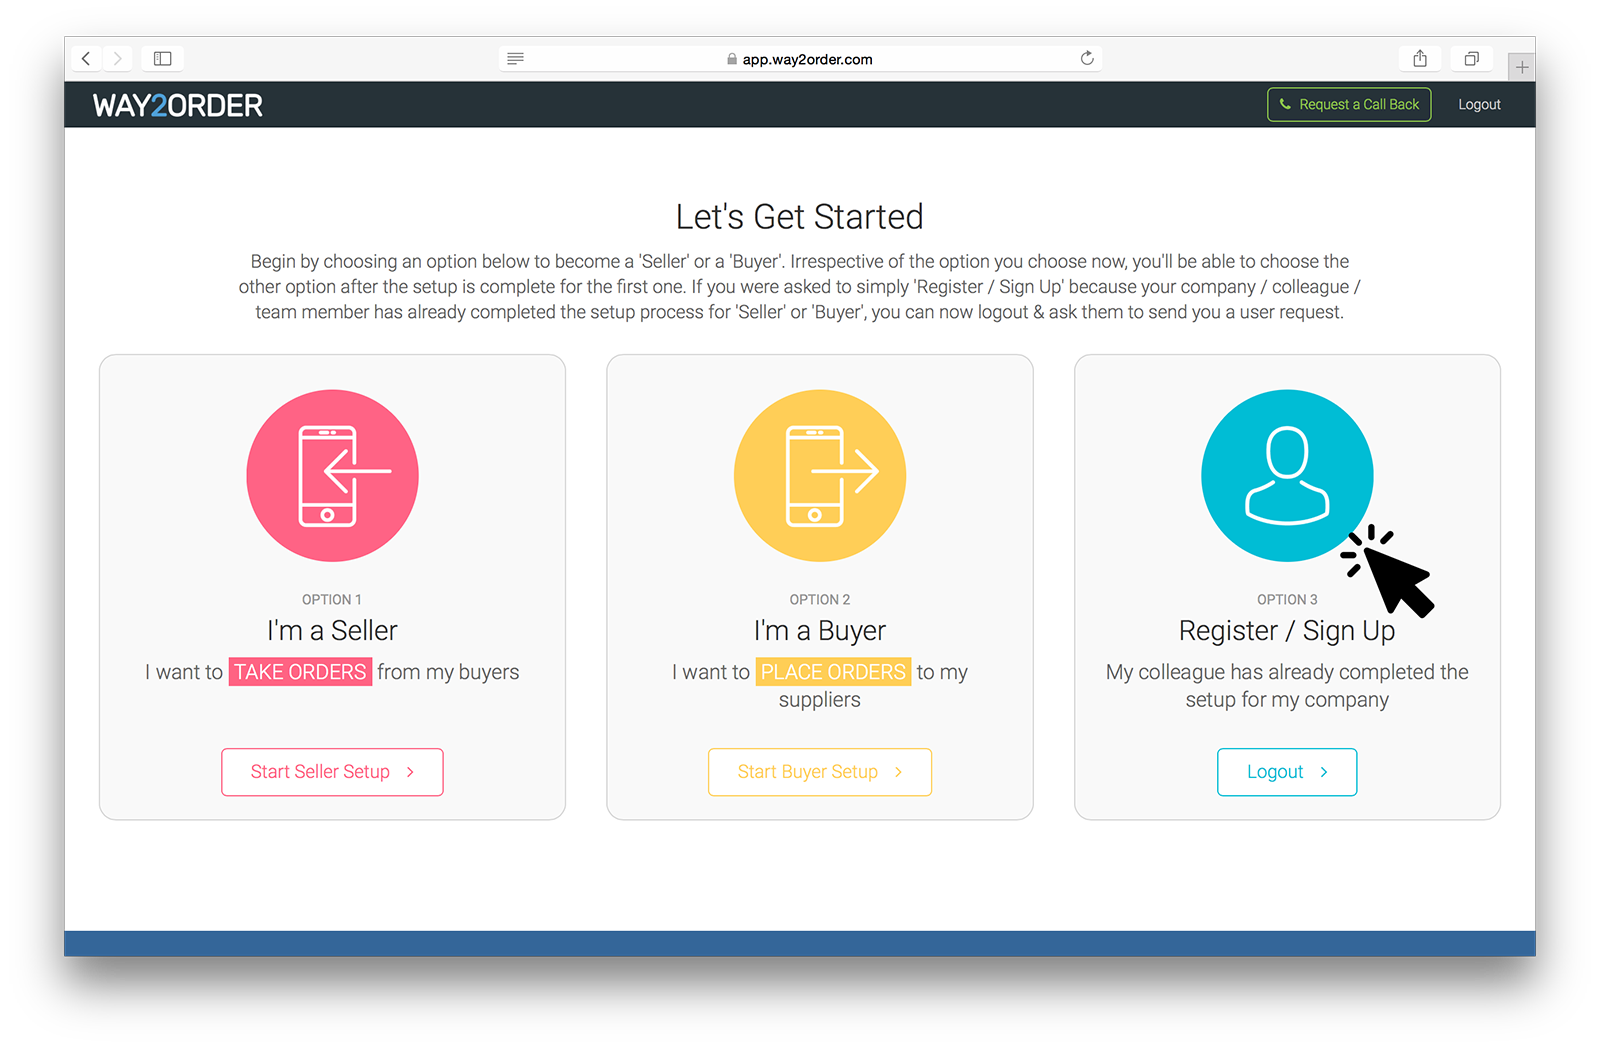
After signing up, the first screen you see is the "Let's Get Started" screen. To start accepting orders, you need to become a 'Seller' on the Way2Order platform. Click 'Start Seller Setup' to continue.
More Info
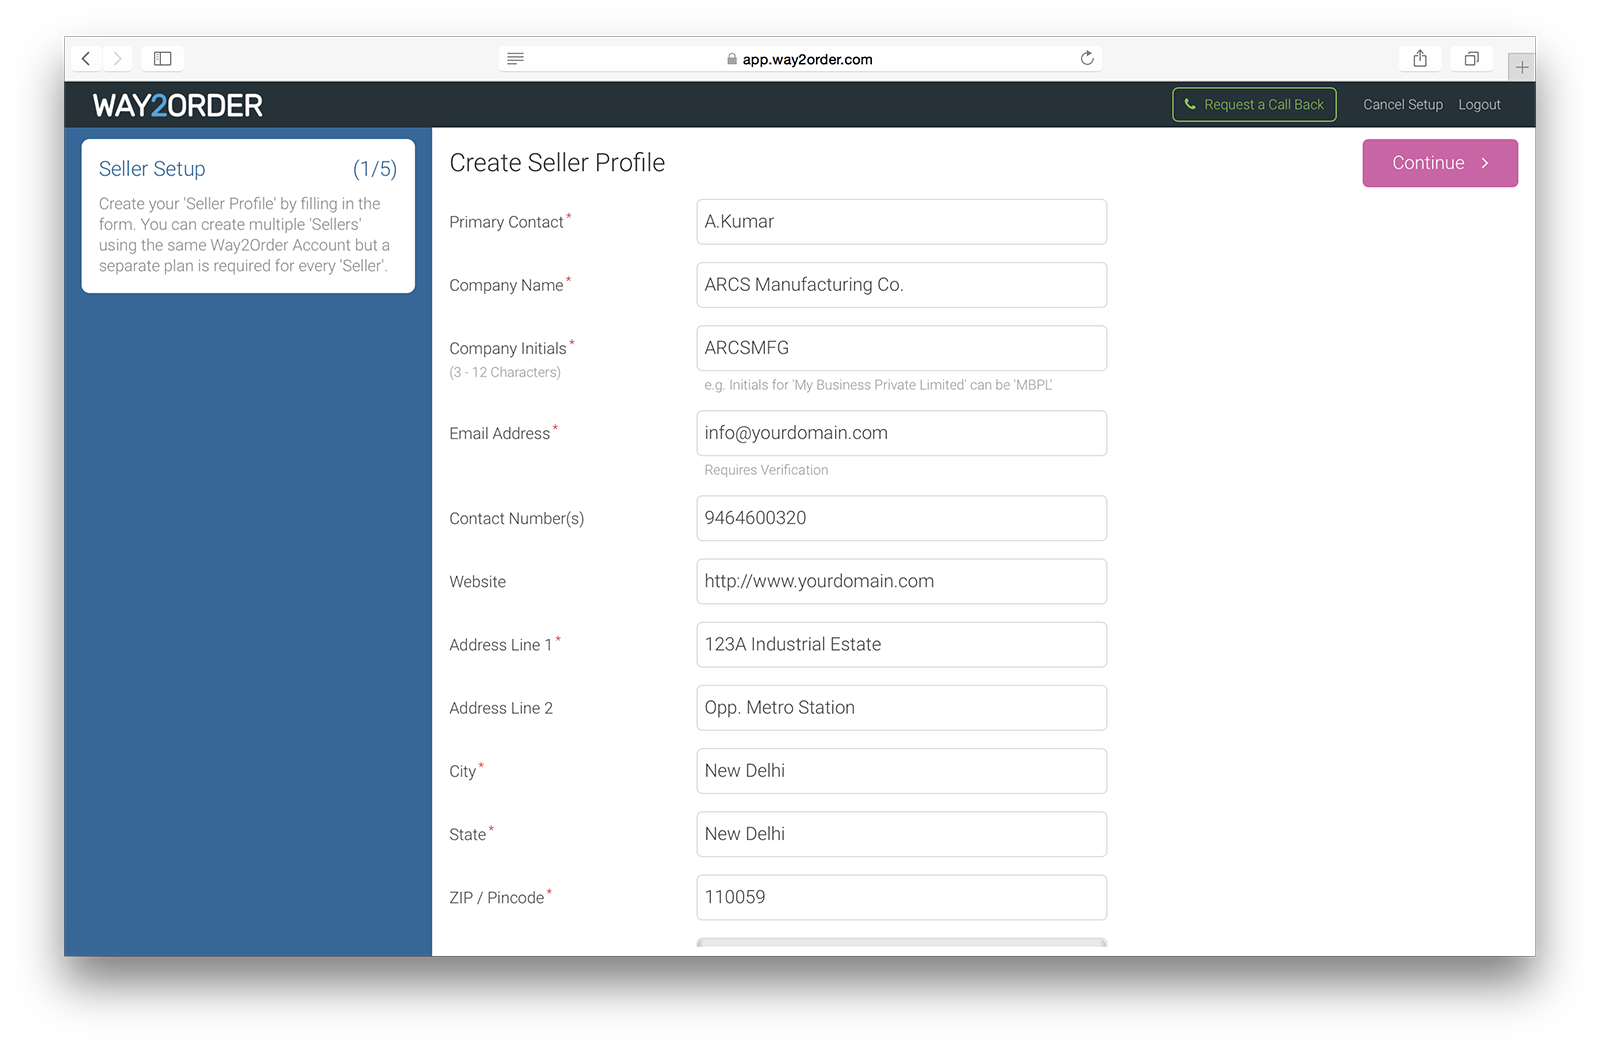
Create your seller profile by entering in some basic information - Primary Contact, Company Name, Company Initials, Email Address & Postal Address Details.
The email address field is very important & requires verification. Information regarding New Buyer Requests & New Orders will be received as an email on this address.
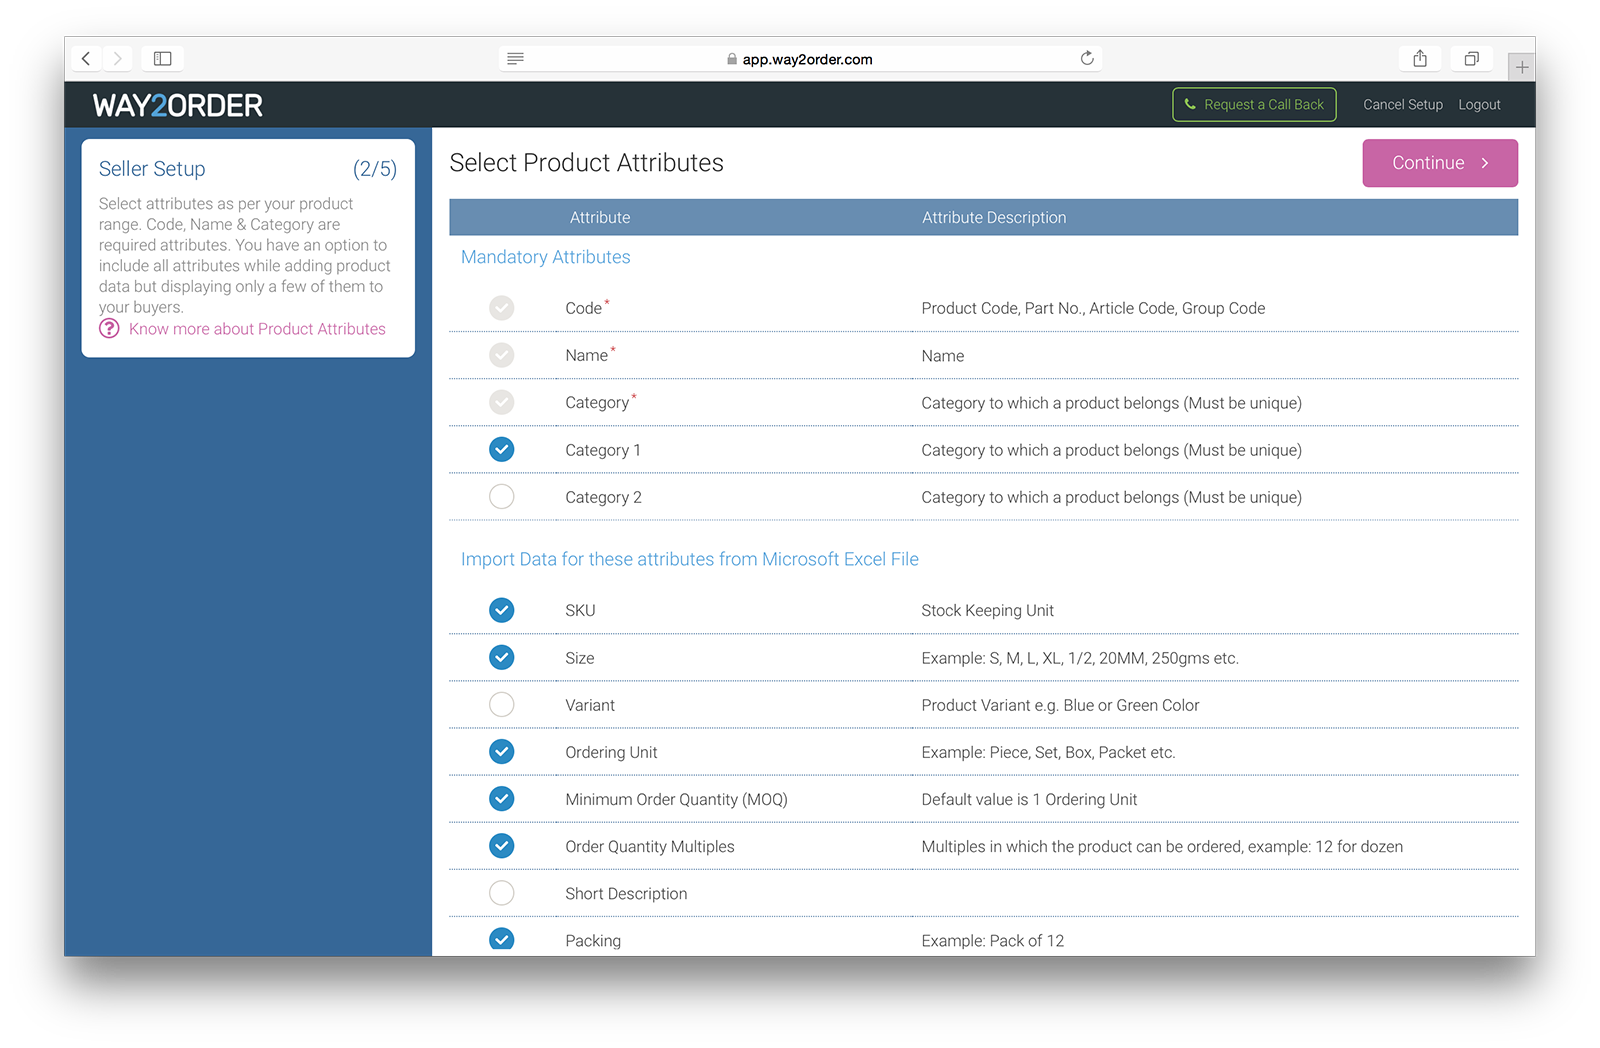
Select attributes as per your product range. Code, Name & Category are required attributes. You have an option to include all attributes while adding product data but only displaying a few of them to your buyers. Data for majority of these attributes can be imported by simply uploading an Excel (XLS) file.
Next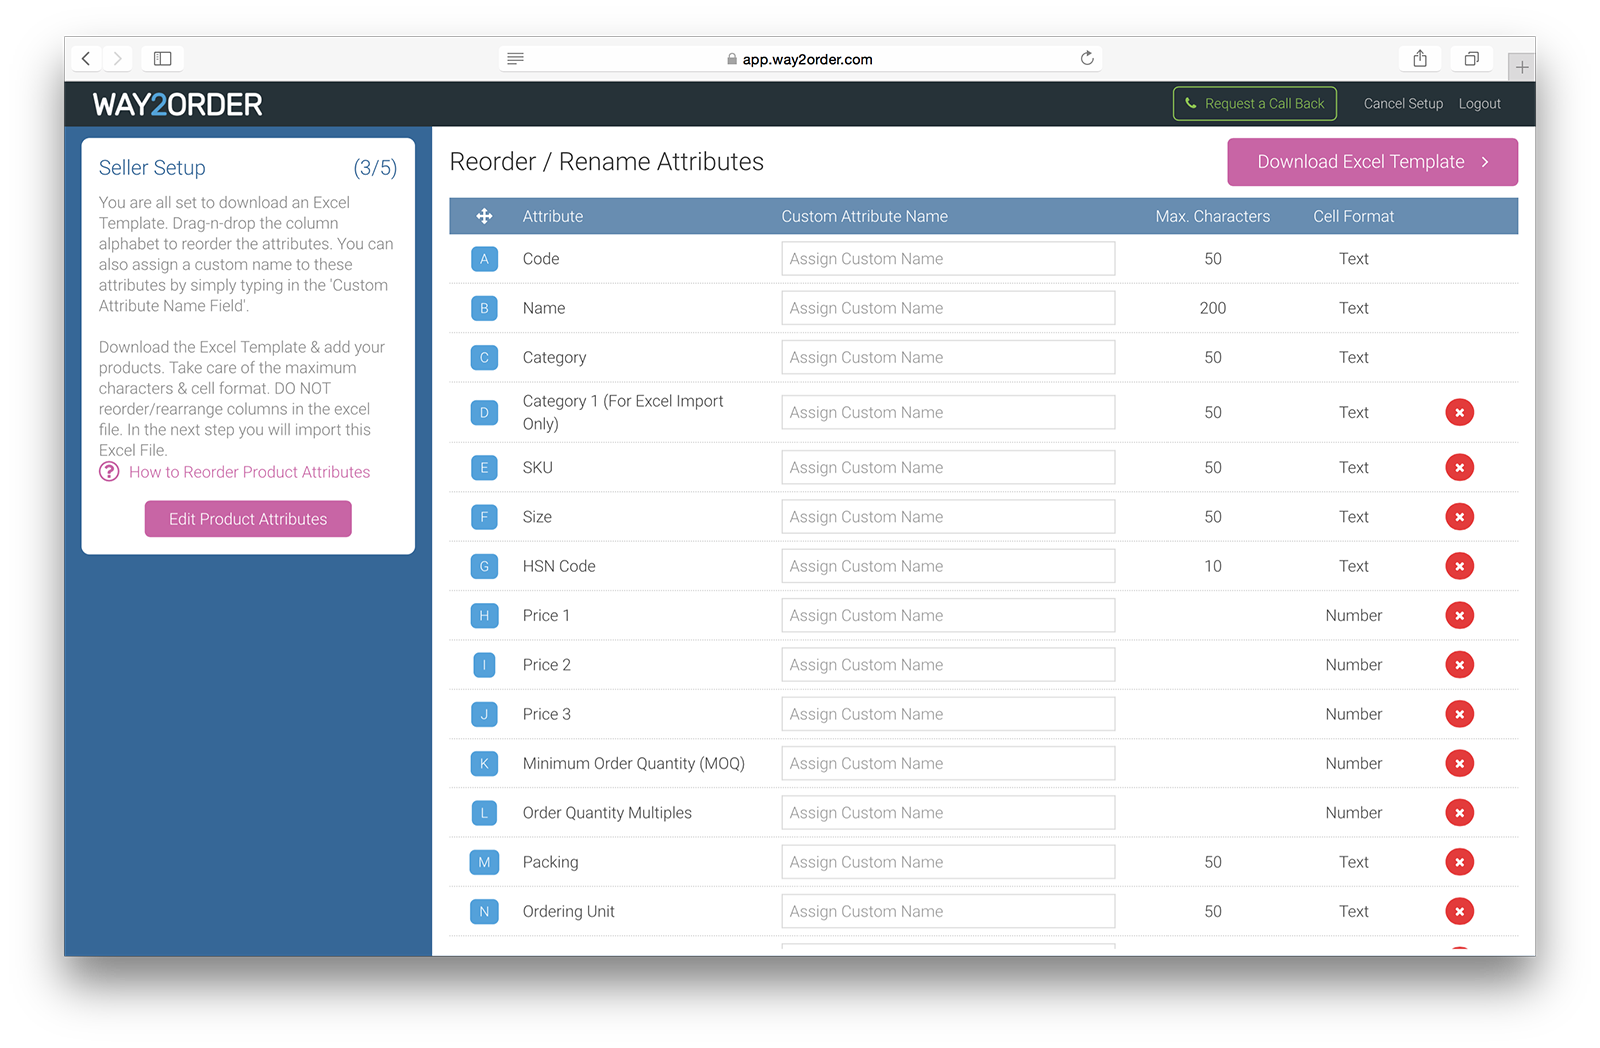
The attributes you selected in the previous step are listed here. You can assign a custom name to these attributes e.g. 'Price 1' can be 'MRP' or 'List Price' & so on.
If you already have your price-list in Excel format, you can reorder these attributes by dragging the column name badge and matching their order with the columns in your price-list. Or you can simply download the blank Excel template & add your products.
Take care of the maximum characters & cell format. DO NOT reorder/rearrange columns in the Excel template file (downloaded from Way2Order).
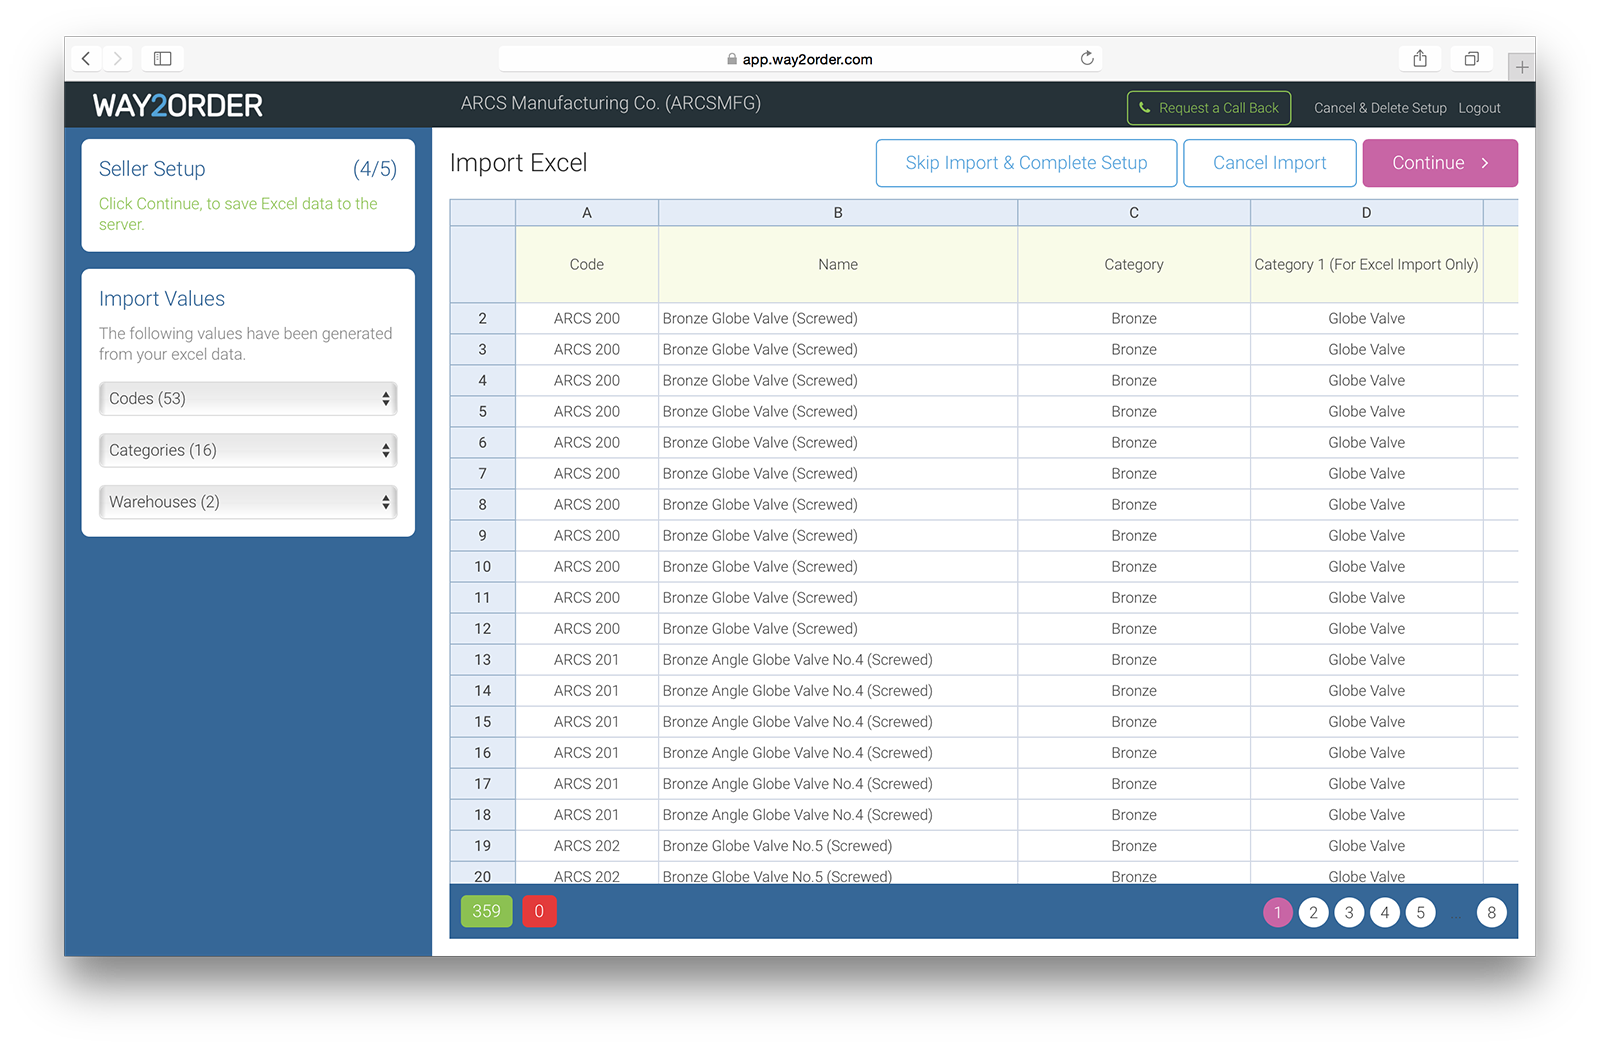
Browse your Excel file & Way2Order displays the Excel data for your review. The unique import values for attributes like code, category, tax-tiers & warehouses, is listed on the left. Errors, if any, are highlighted in red. A maximum of 1000 rows of data can be imported in one go.
More Info
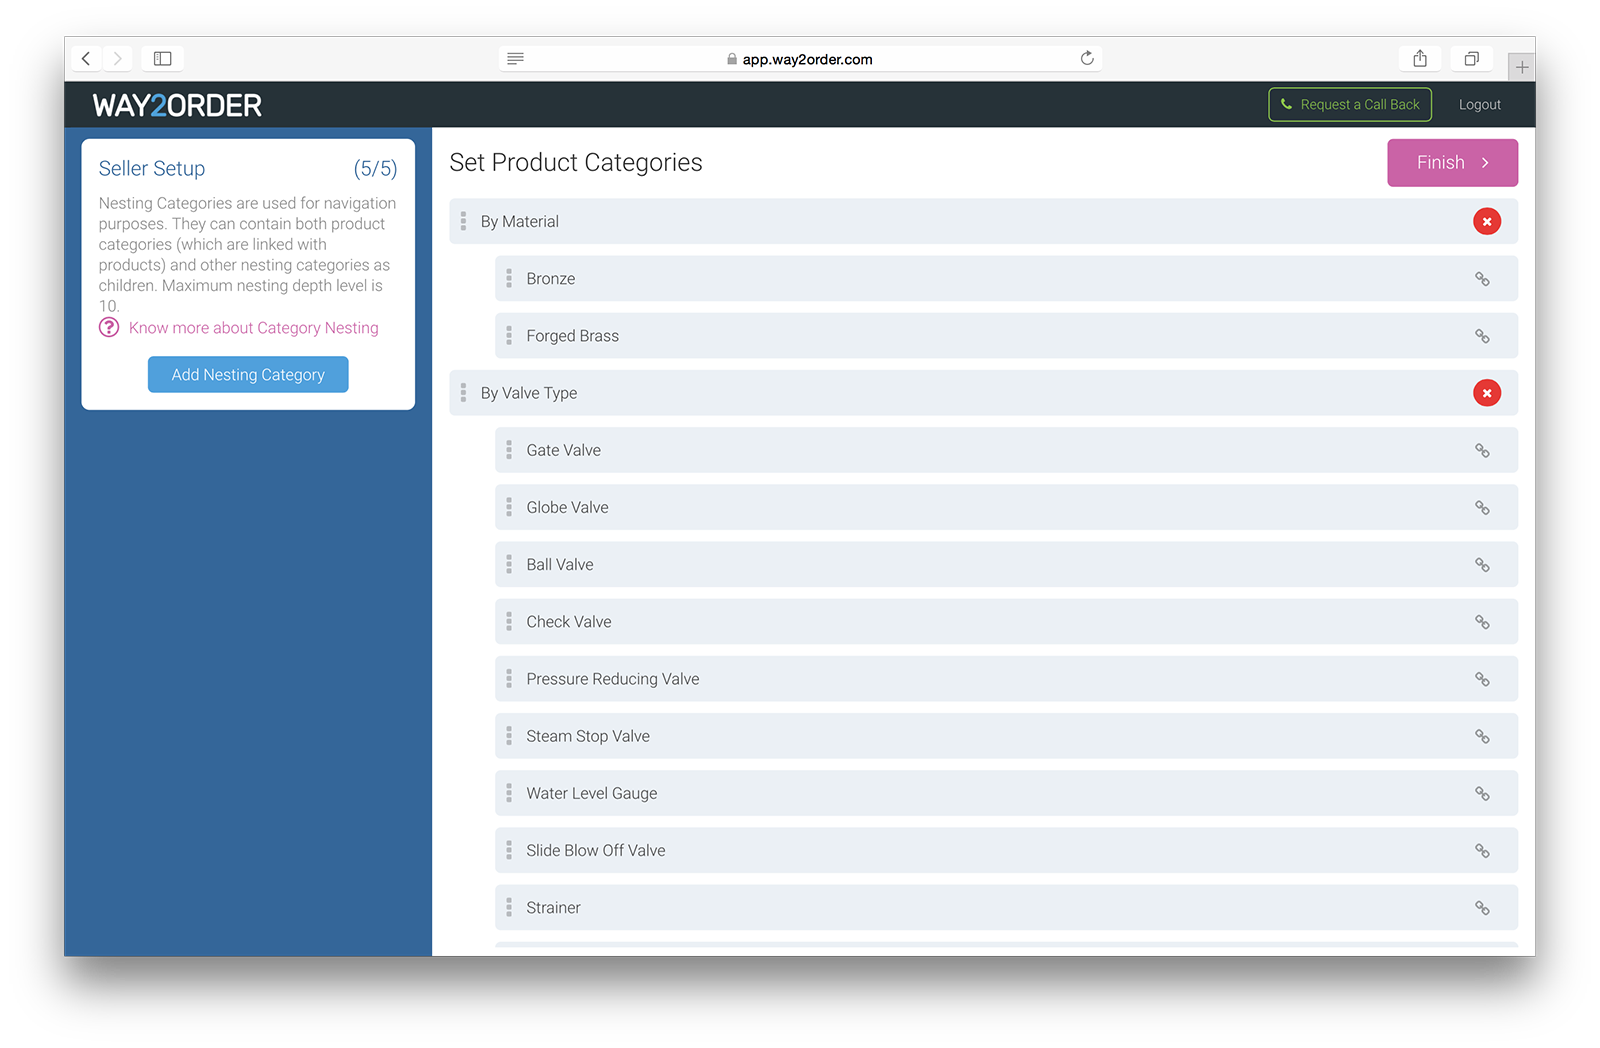
The data import process, automatically creates categories by reading the 'Category' column in your Excel file & in this step you can group these categories into sub-categories & so on. Nesting categories are used for navigation purposes. They can contain both product categories (which are linked with products) and other nesting categories as children.
Drag-n-drop the product categories under different nesting categories to define your product catalog category navigation. Maximum nesting depth level is 10.
More Info
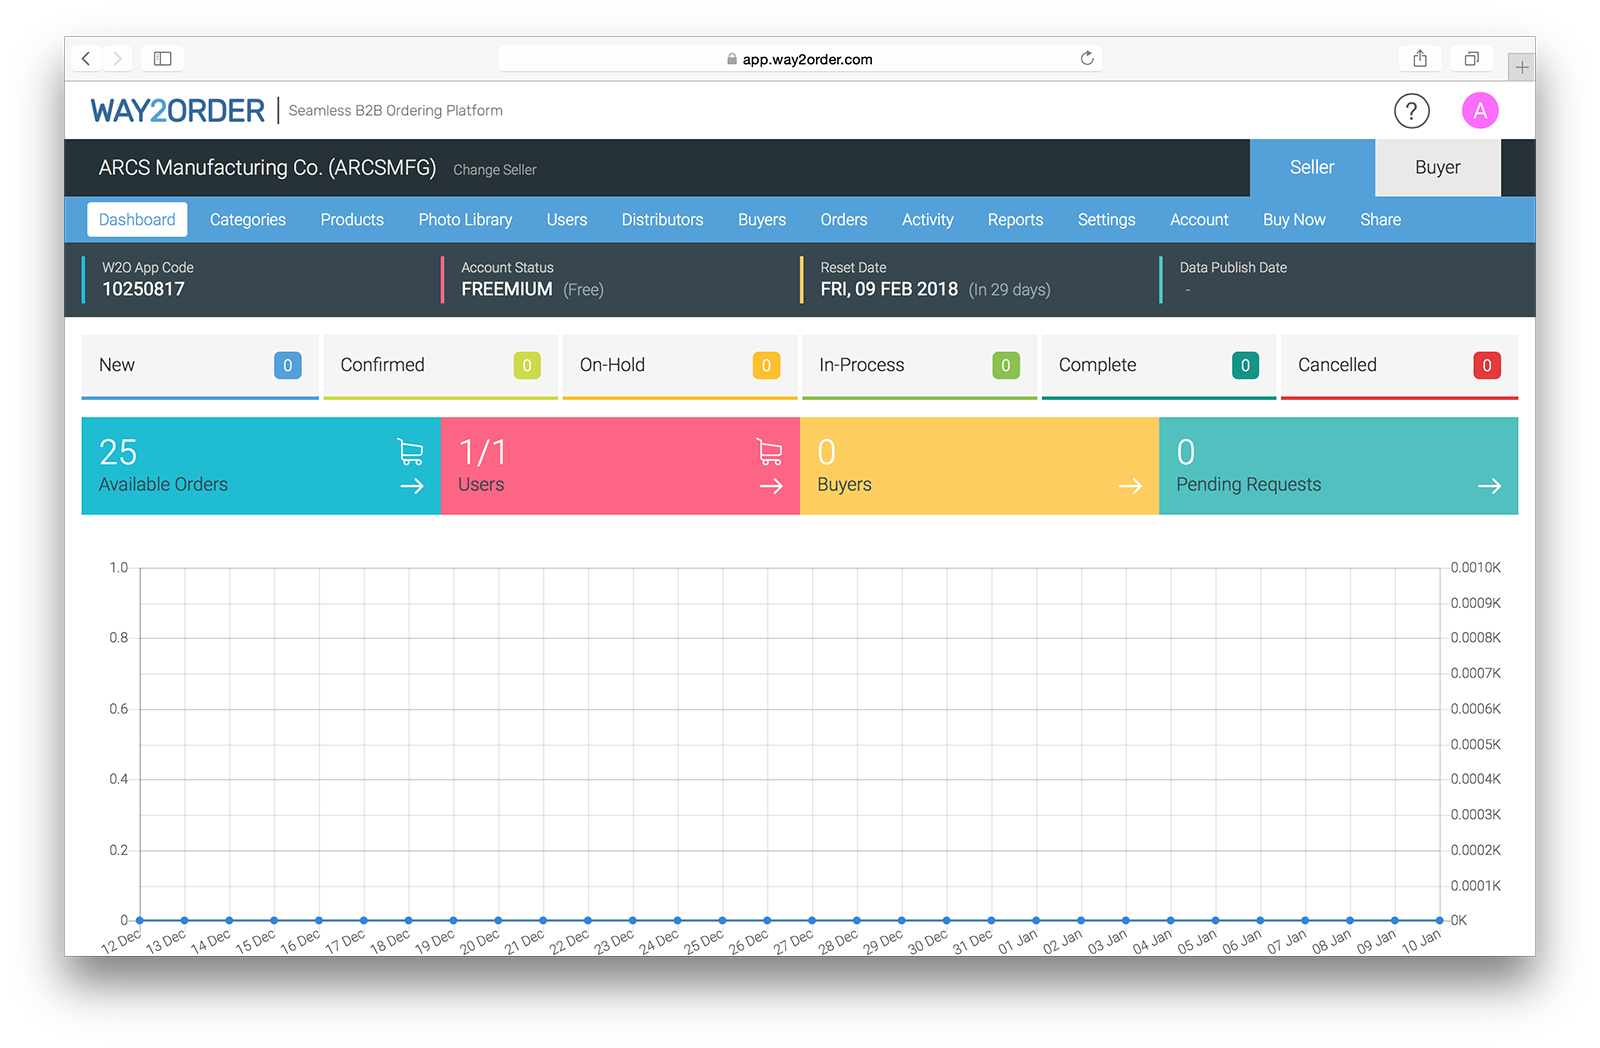
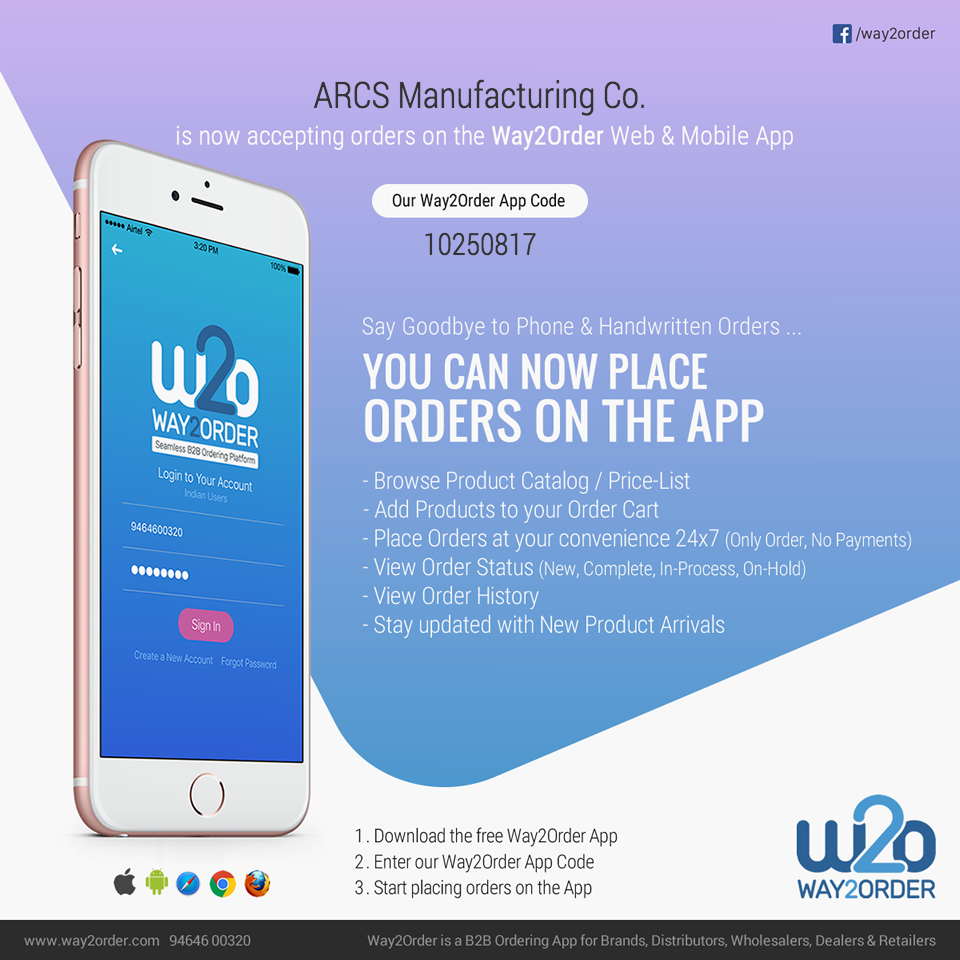
That's it, your Seller Setup is now complete & your unique 8-digit, Way2Order App Code is generated. This App Code identifies you as a 'Seller' on the Way2Order platform and is the connecting link between you & your wholesale customers. Share this app code with your customers and invite them to place orders to you on the Way2Order platform.
Next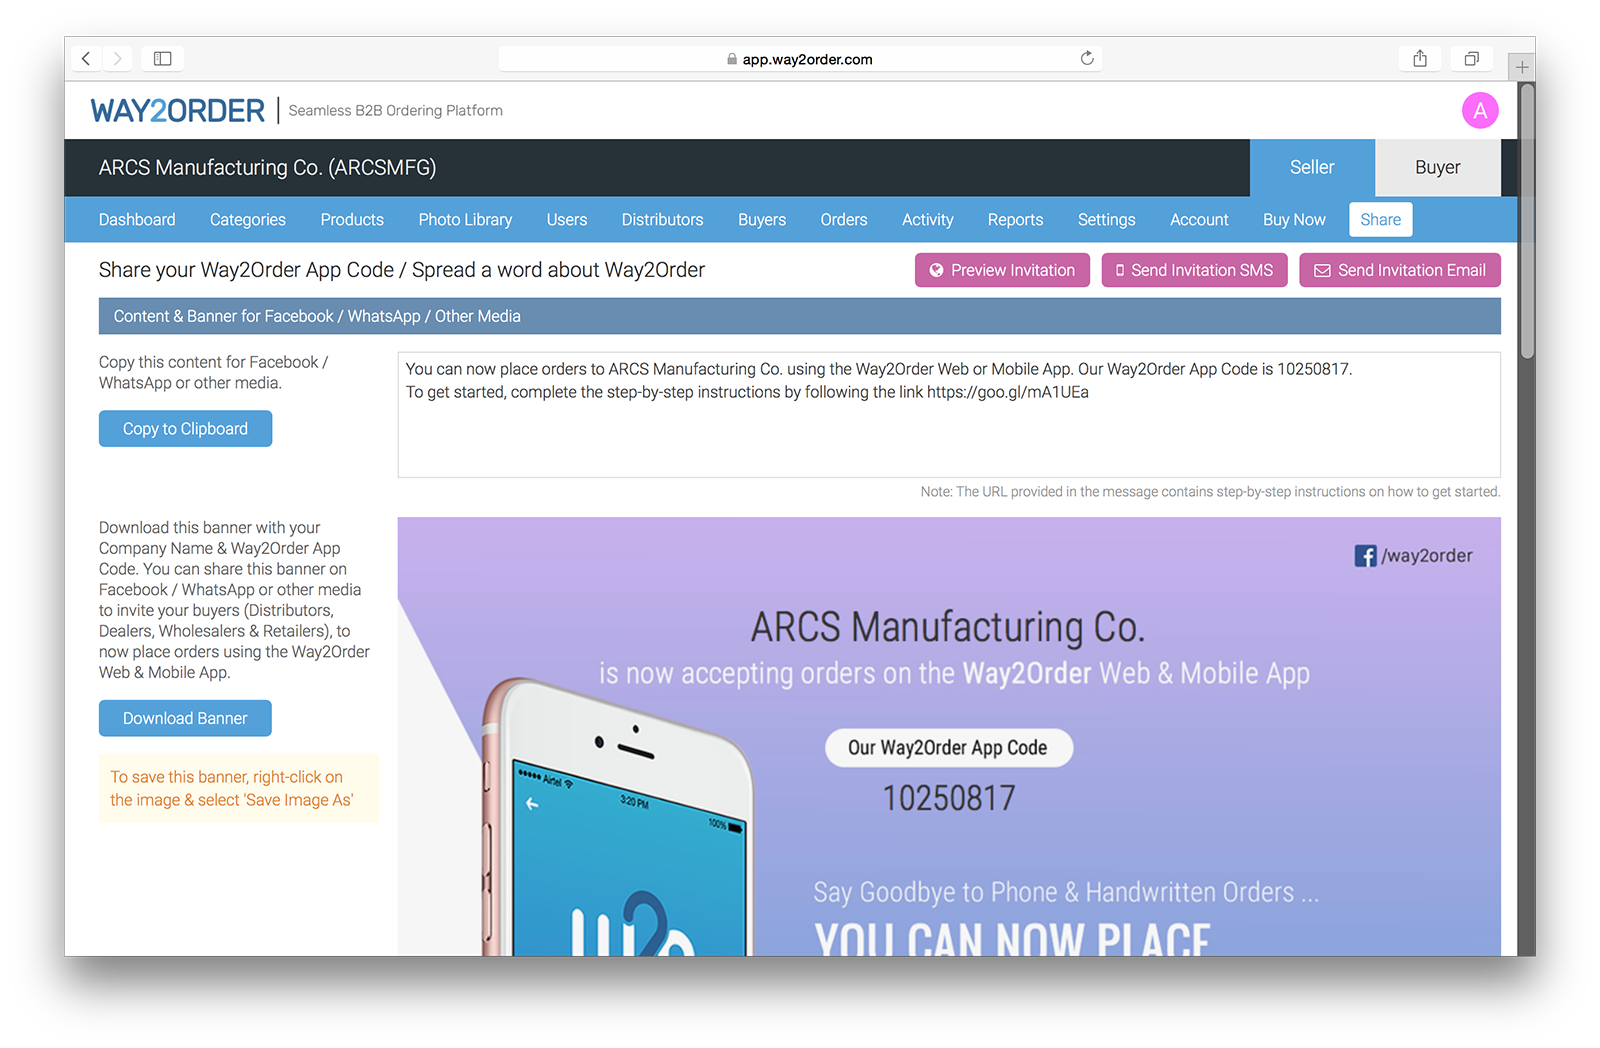
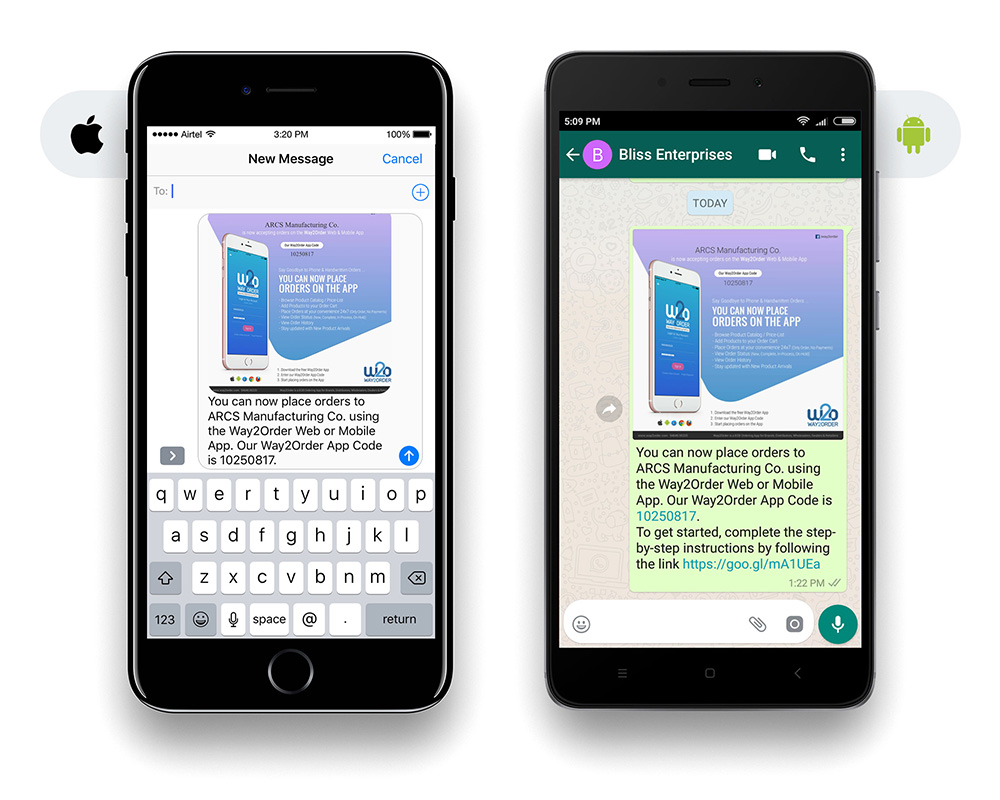
To invite your wholesale customers (Distributors, Dealers, Wholesalers & Retailers) to start placing orders on the Way2Order platform, you need to share your App Code with them.
We provide you a Way2Order Invitation Banner, customised with your Company Name & App Code. Go to the 'Share' section & download this banner. We even provide you a short URL, that contains the step-by-step instructions for your buyers on how to get started.
Invitation Banner Template & Share Options

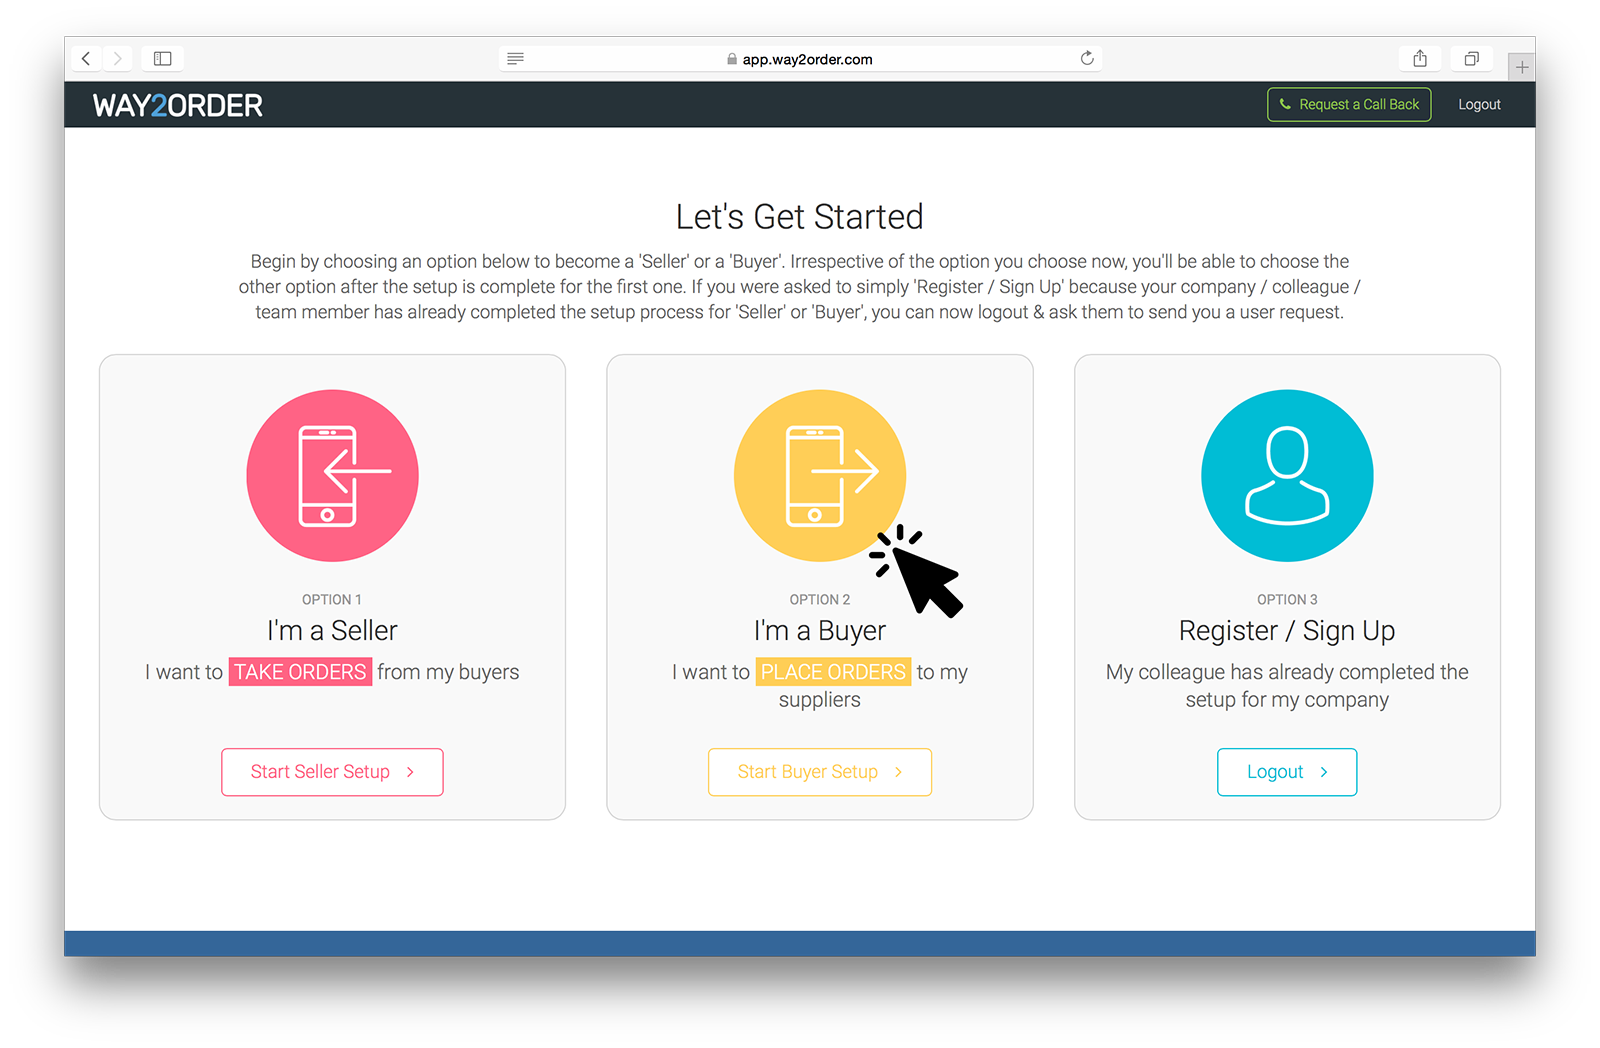
Your buyer receives the invitation & signs up using the Way2Order Web or Mobile Apps. After signing up, the first screen is the "Let's Get Started" screen. To start placing orders, your buyer chooses "Option 2 - I'm a Buyer" & clicks 'Start Buyer Setup' to continue.
More Info
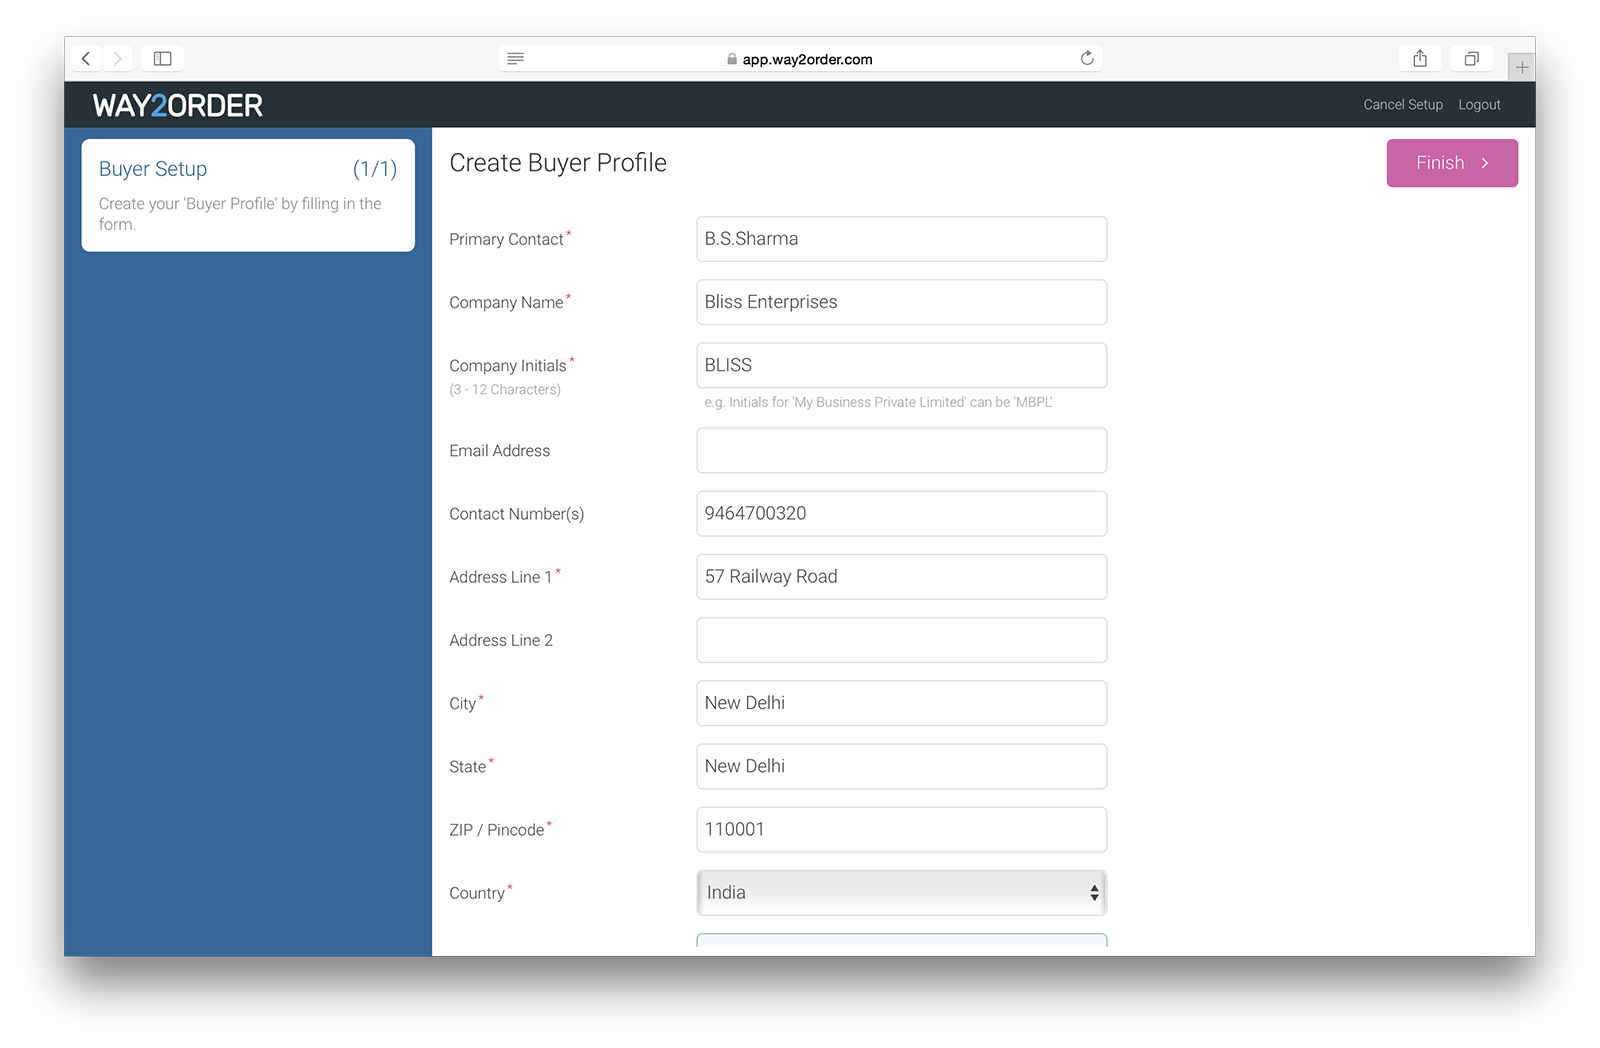
Your buyer creates his buyer profile by entering in some basic information - Primary Contact, Company Name, Company Initials & Postal Address Details.
Next
That's it, the Buyer Setup is now complete. To start placing orders on the Way2Order Platform, your buyer adds you as a 'Supplier'.
Next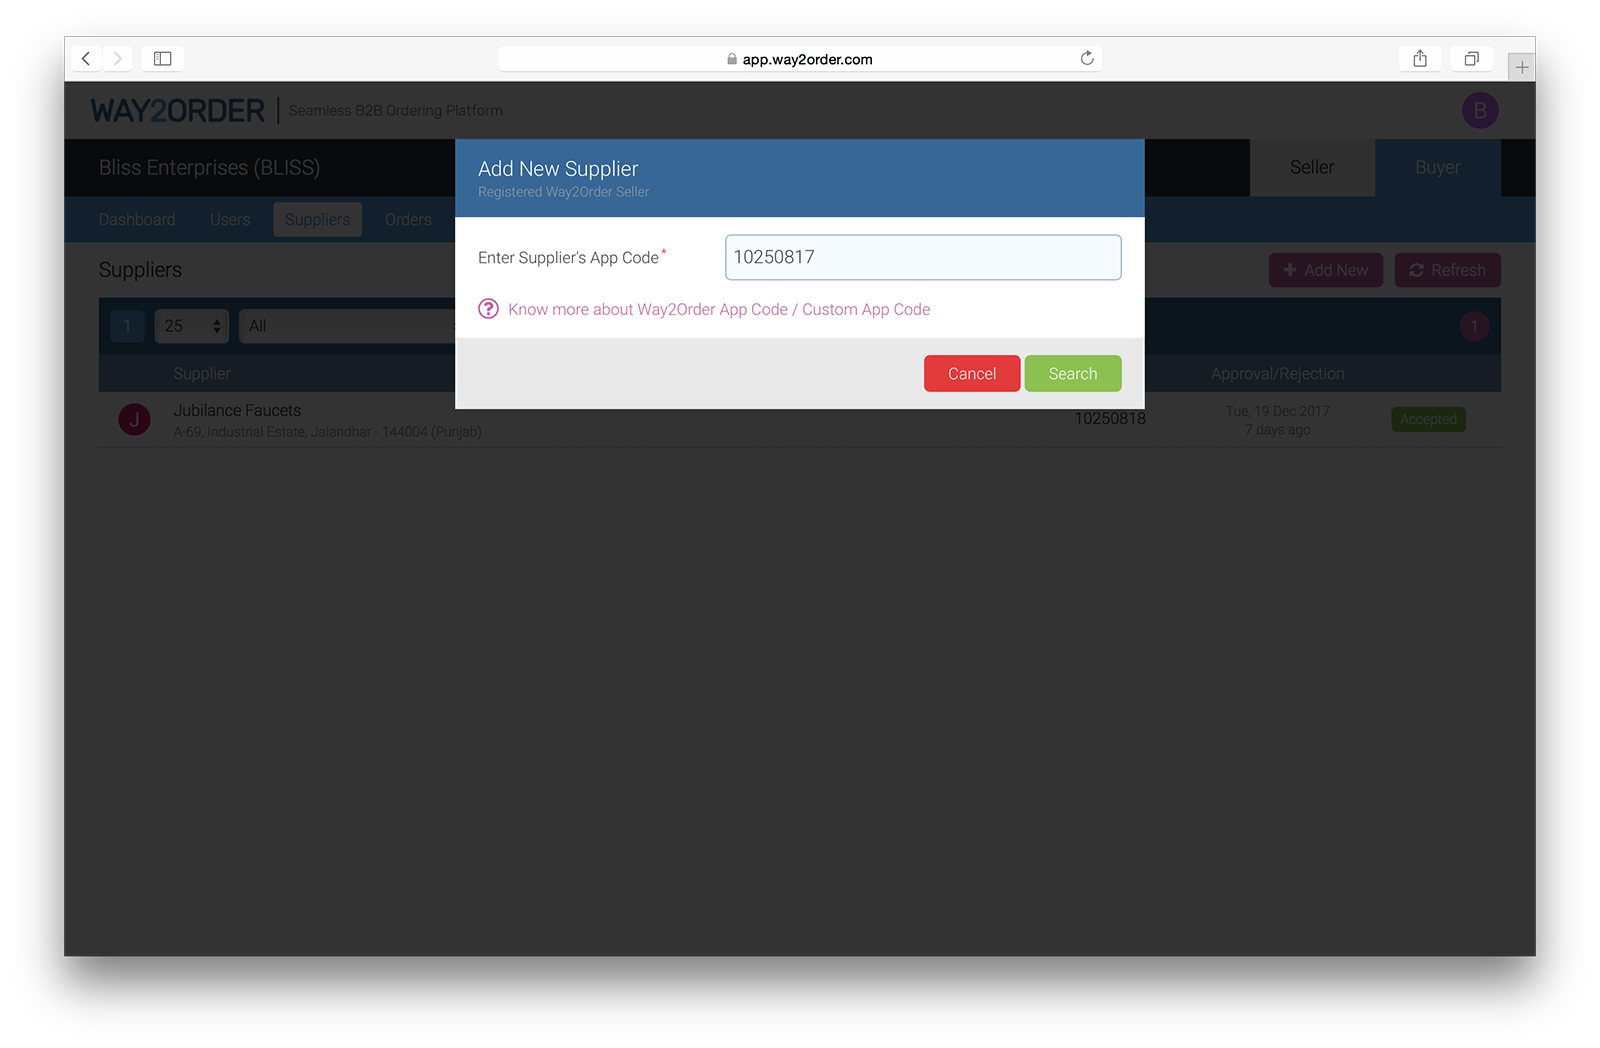
In this step, your buyer adds you as a 'Supplier' by entering in your Way2Order App Code (that you shared with your buyer in a previous step). This is a one-time process.
More Info
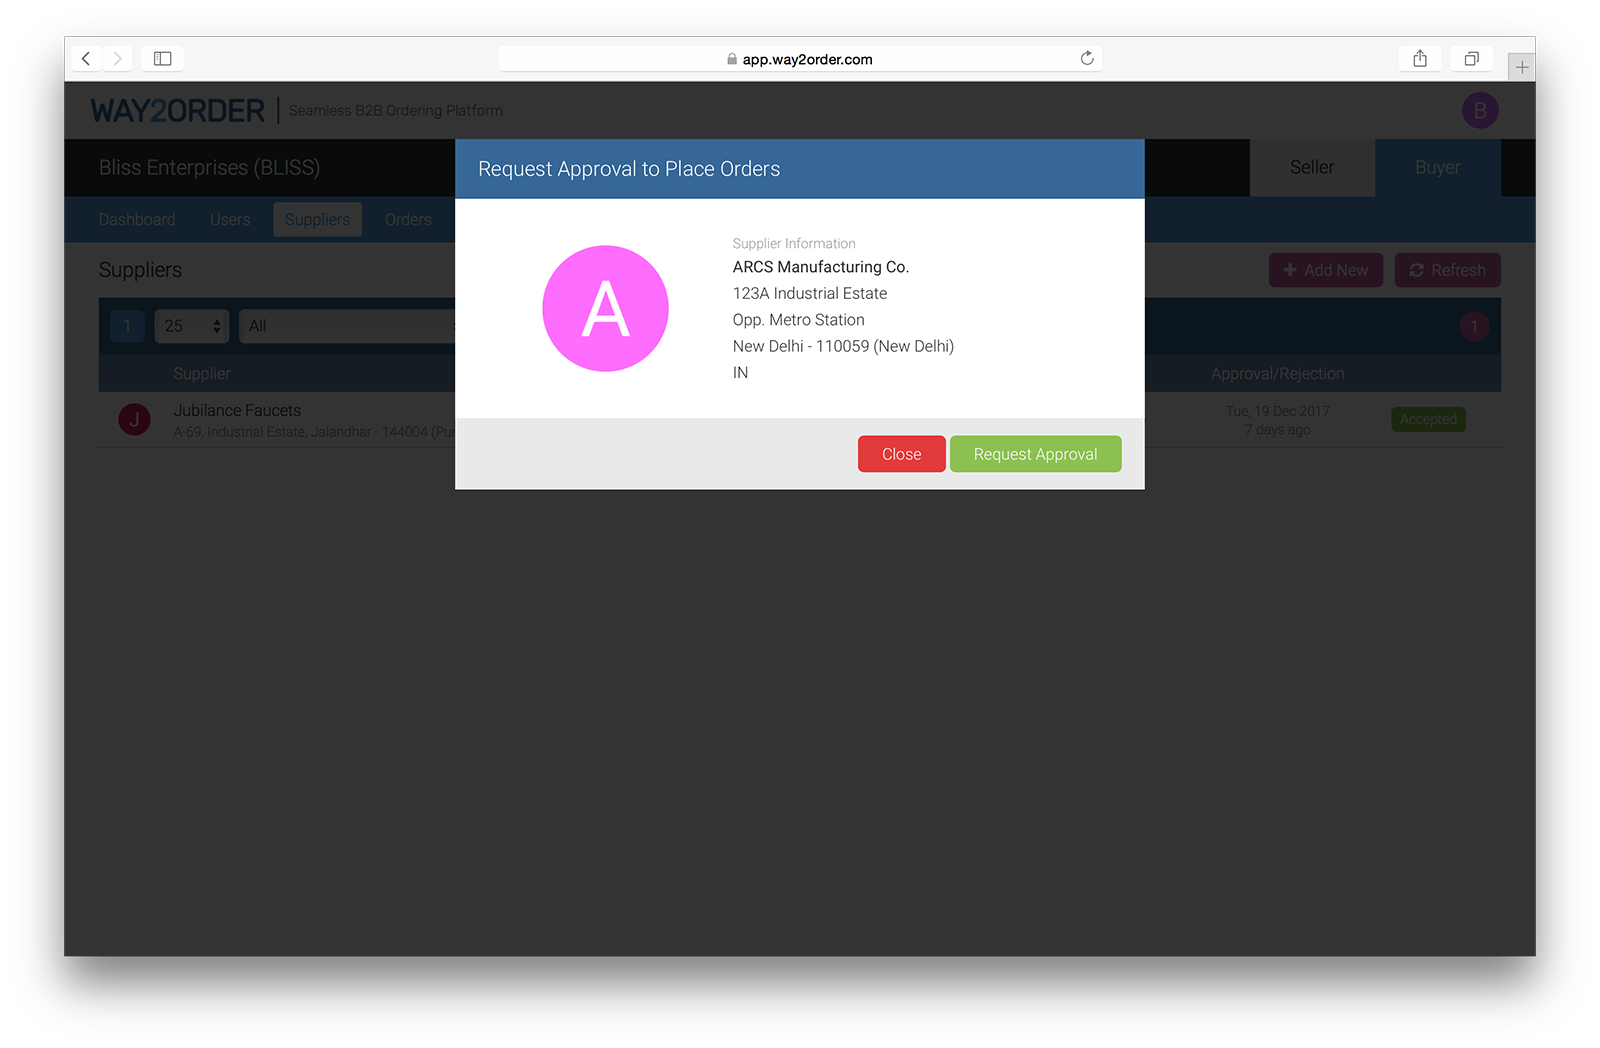
If the 'Supplier App Code' entered in the previous step is correct, your buyer should see your information. To request approval to place orders, your buyer clicks the 'Request Approval' button.
Next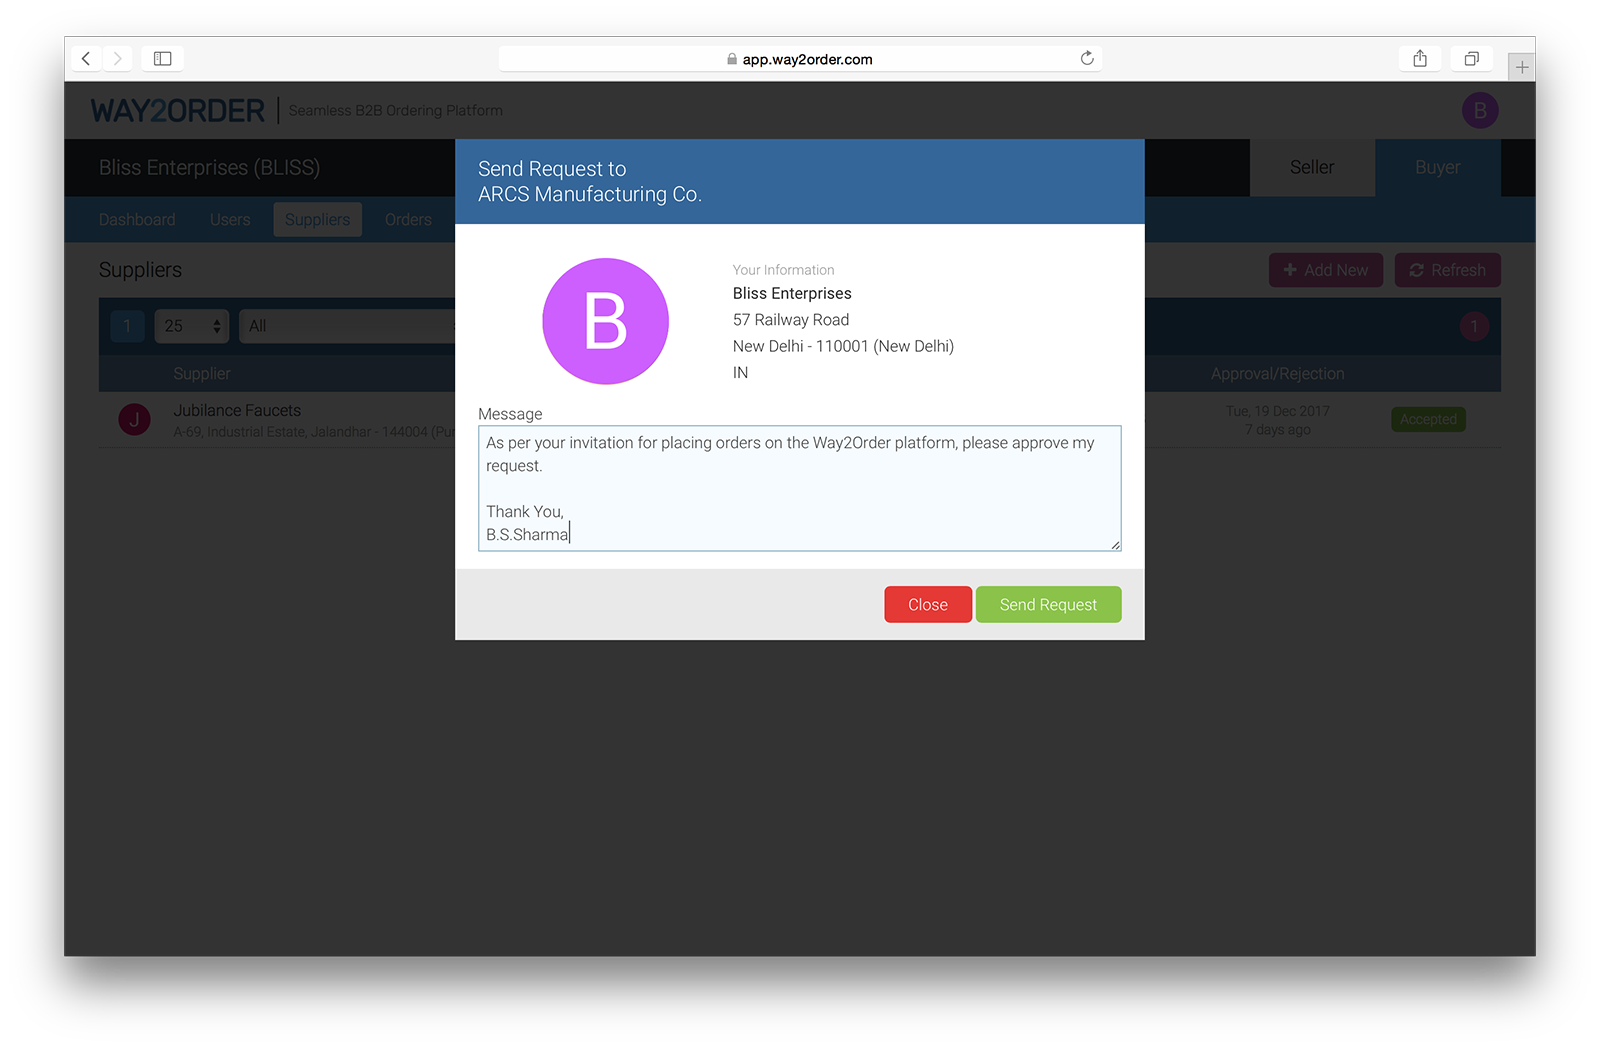
A default message is already entered in for your buyer. A custom message can also be written & sent with the request to place orders.
Next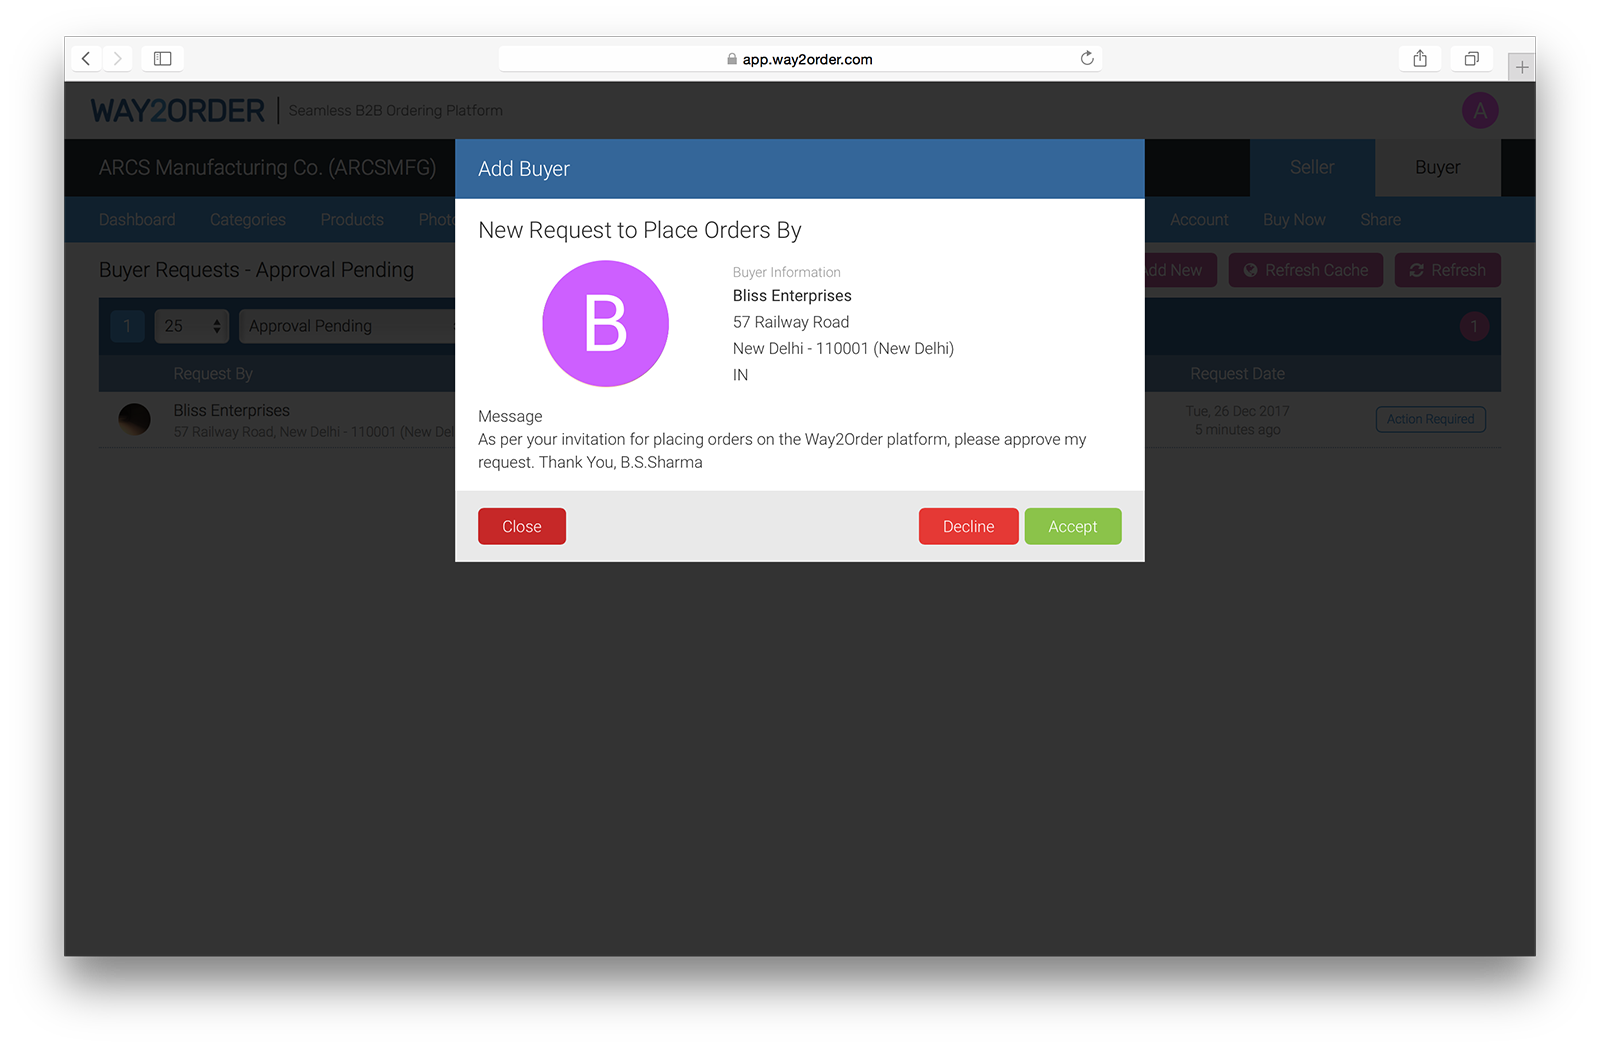
Your wholesale customers who were invited to place orders using the Way2Order platform, send you a request. You receive the request with their contact details and custom message. You can choose to 'Accept' or 'Decline' their request. Only the buyers you approve will be able to browse your catalog and place orders.
More Info
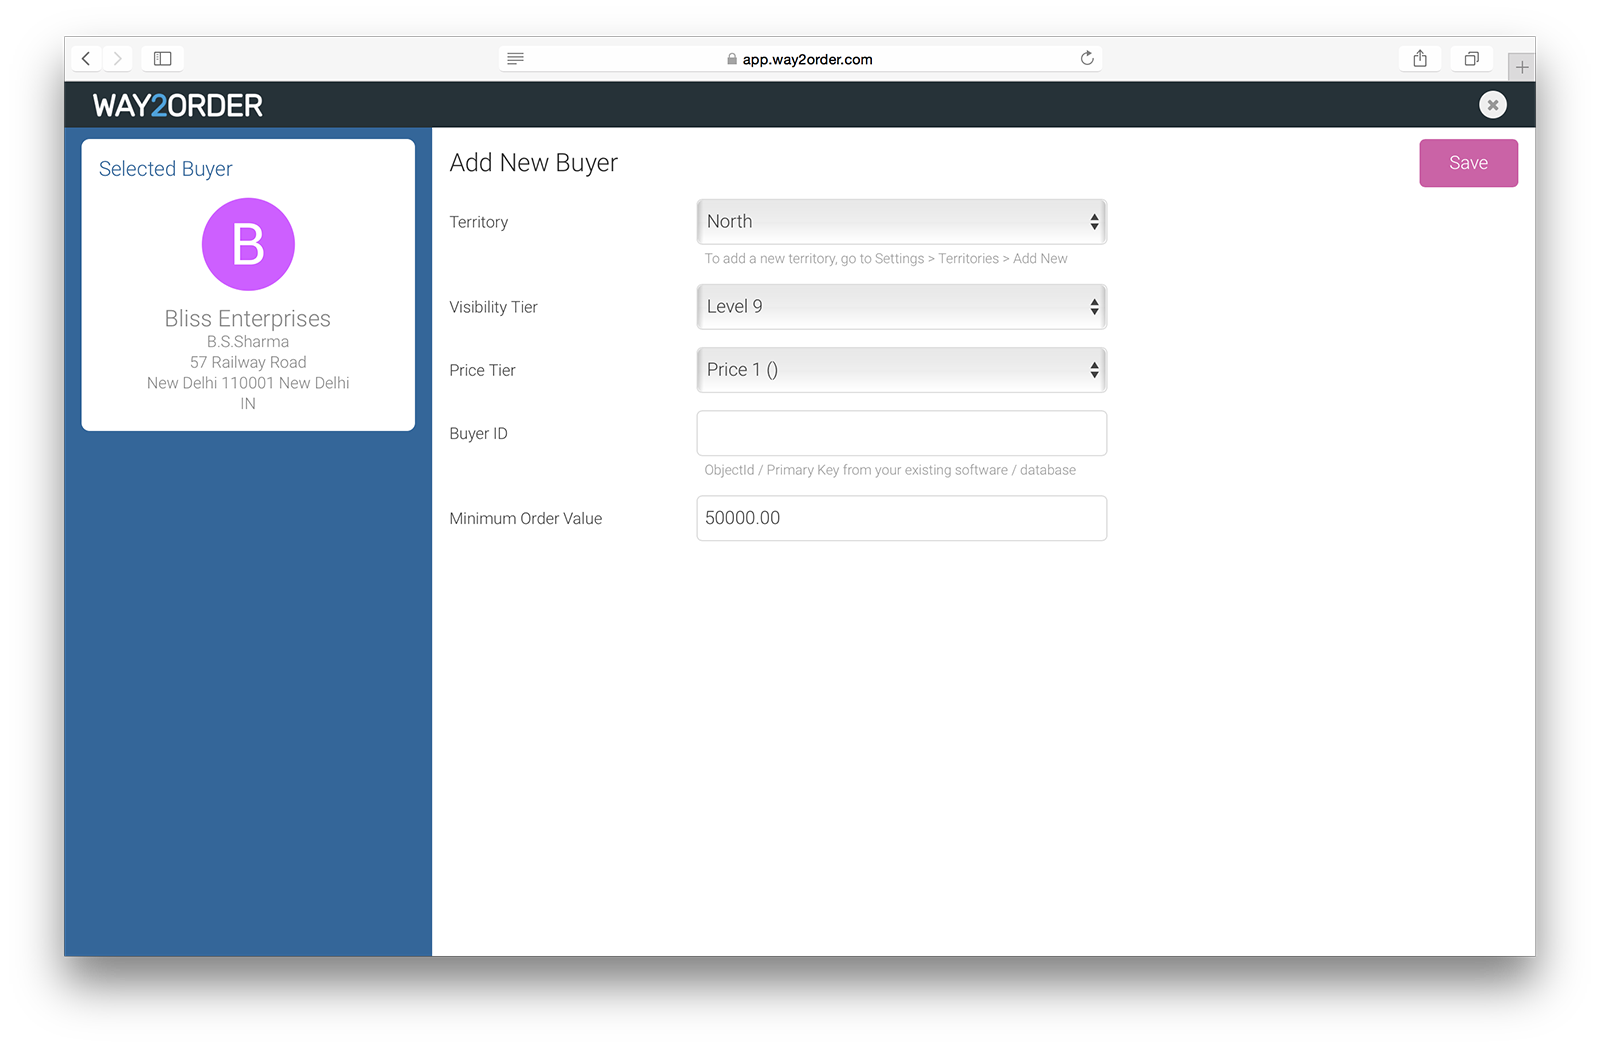
When you choose to 'Accept' your buyers request, you can define the settings for that particular buyer. These settings include - Territory, Visibility Tier, Price Tier & Minimum Order Value. This is a one time setup step and these settings can be changed later.
More Info
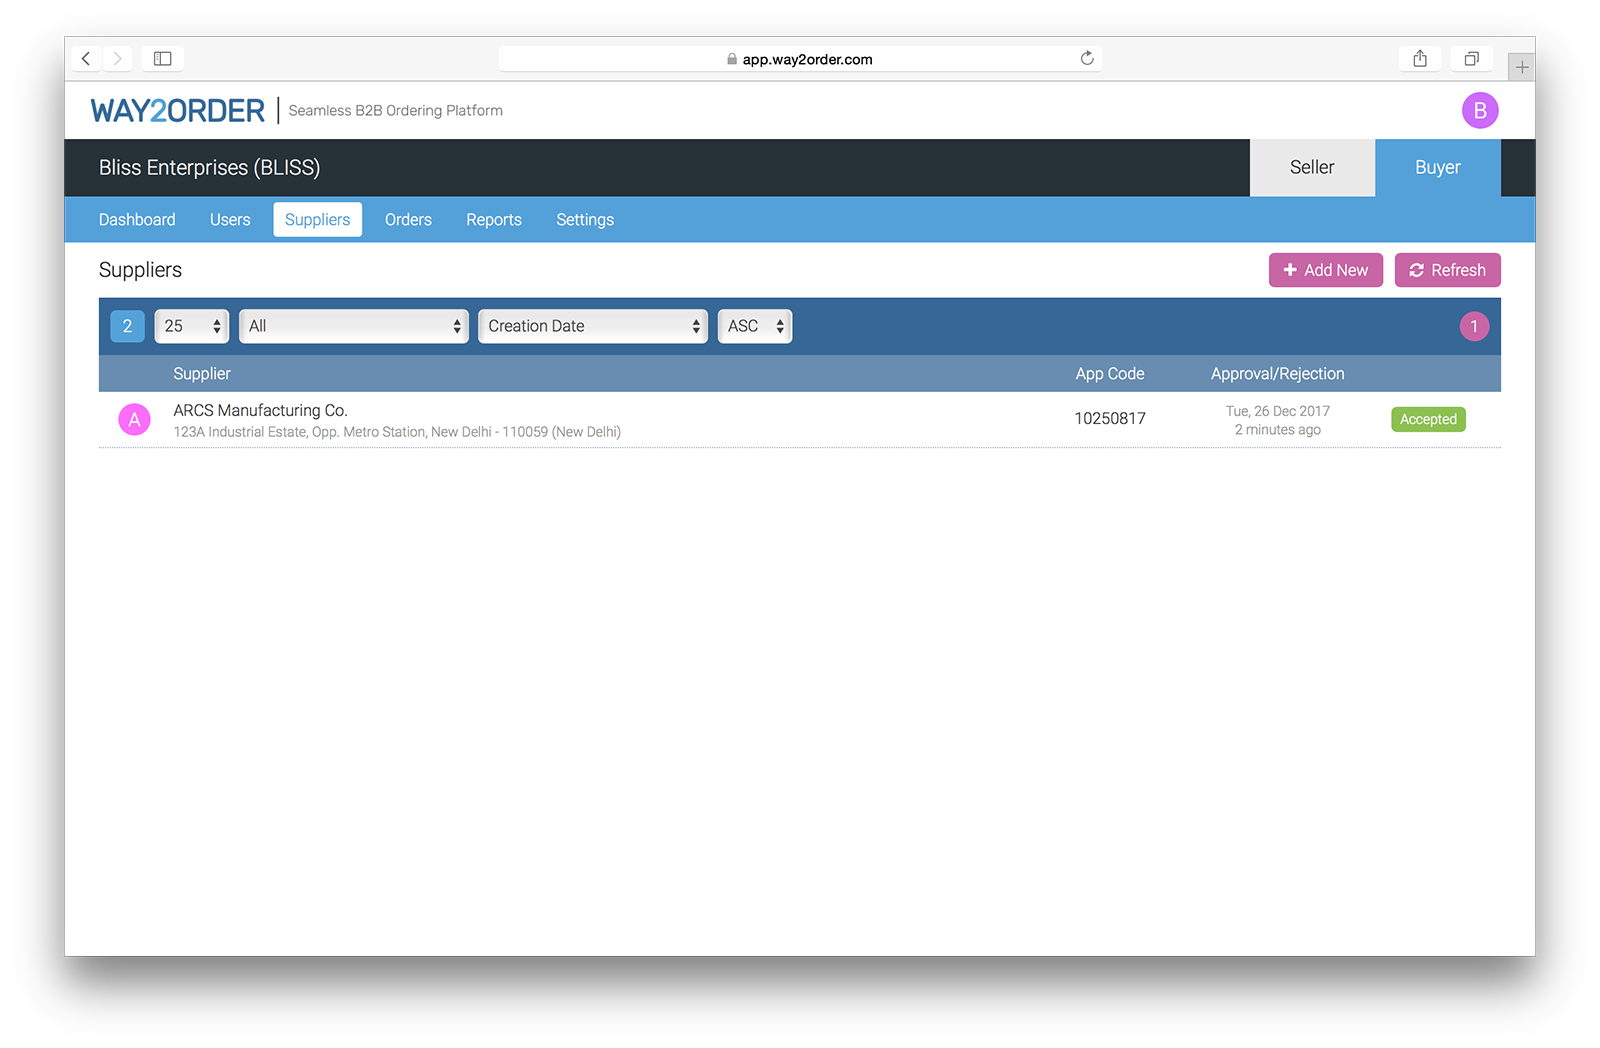
Once you approve your buyer to place orders, he can now browse your product catalog & start placing orders using the Way2Order Web or Mobile App (for Android & iOS)
Next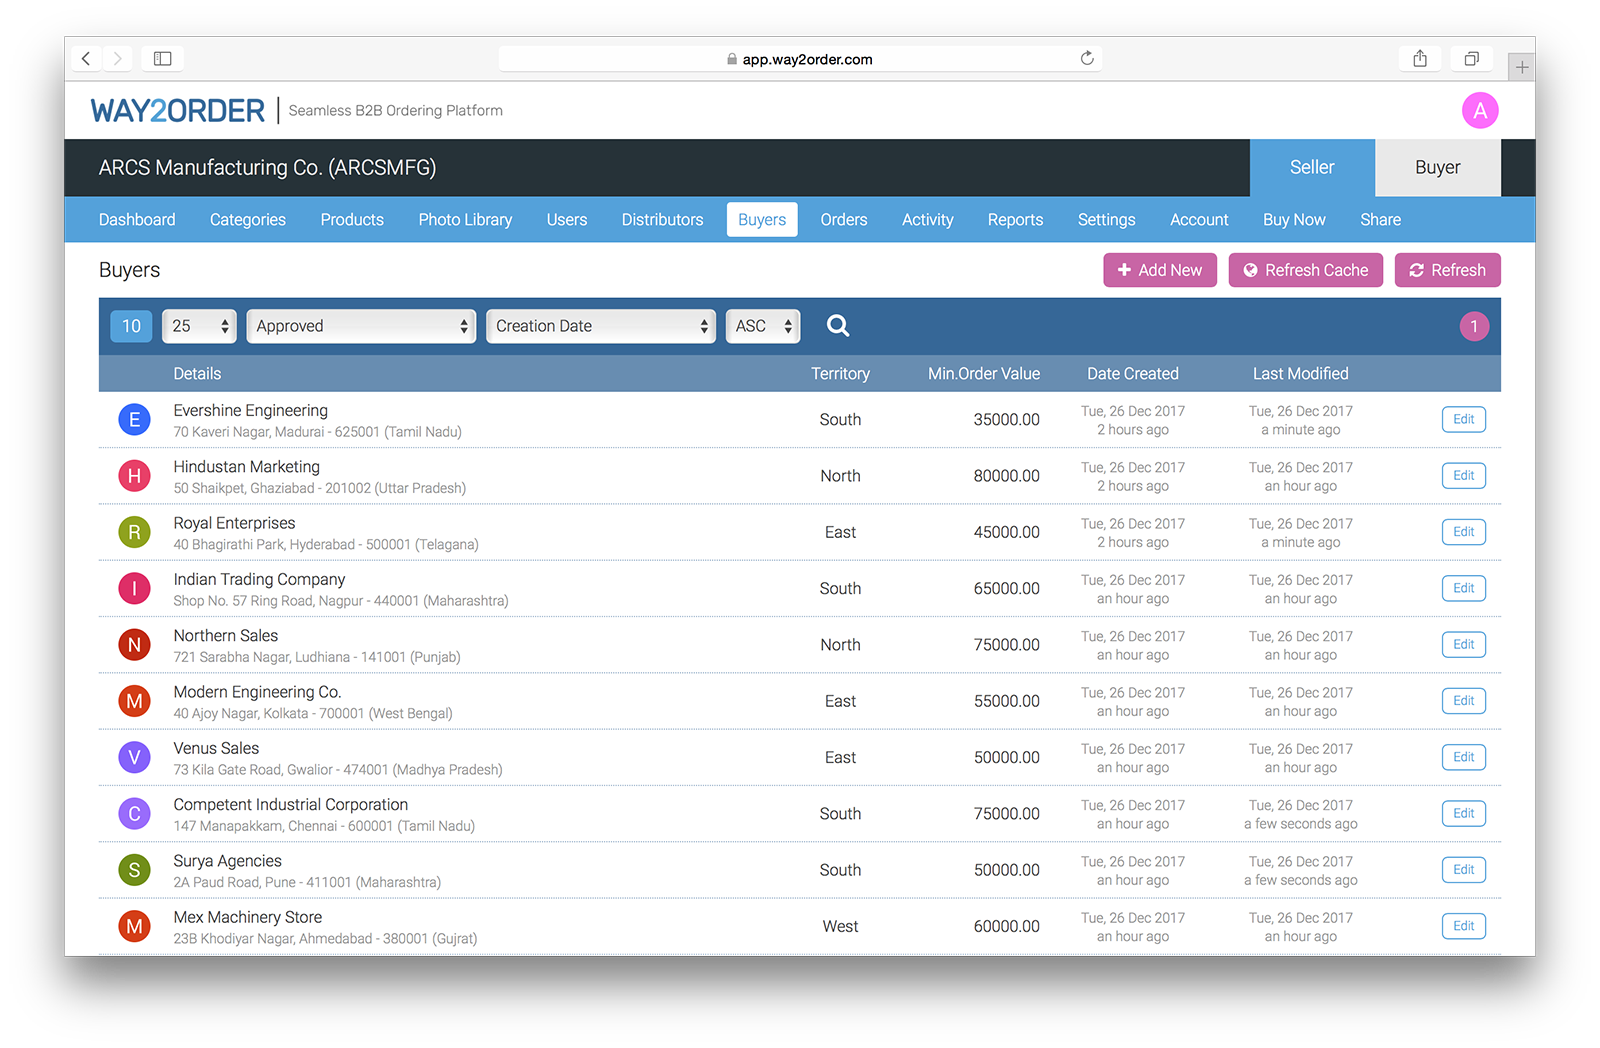
Once you approve your buyer, they can browse your product catalog & start placing orders using the Way2Order Web or Mobile App (for Android & iOS)
Now say goodbye to phone & handwritten orders.
Start Accepting B2B Orders on the App.
To add a 'User' to your 'Seller' Account, your 'User' should be registered on the Way2Order platform.
Simply ask your colleague or team member to sign up for Way2Order (using the Web or Mobile Apps) & then select 'Option 3' to logout.
More Info
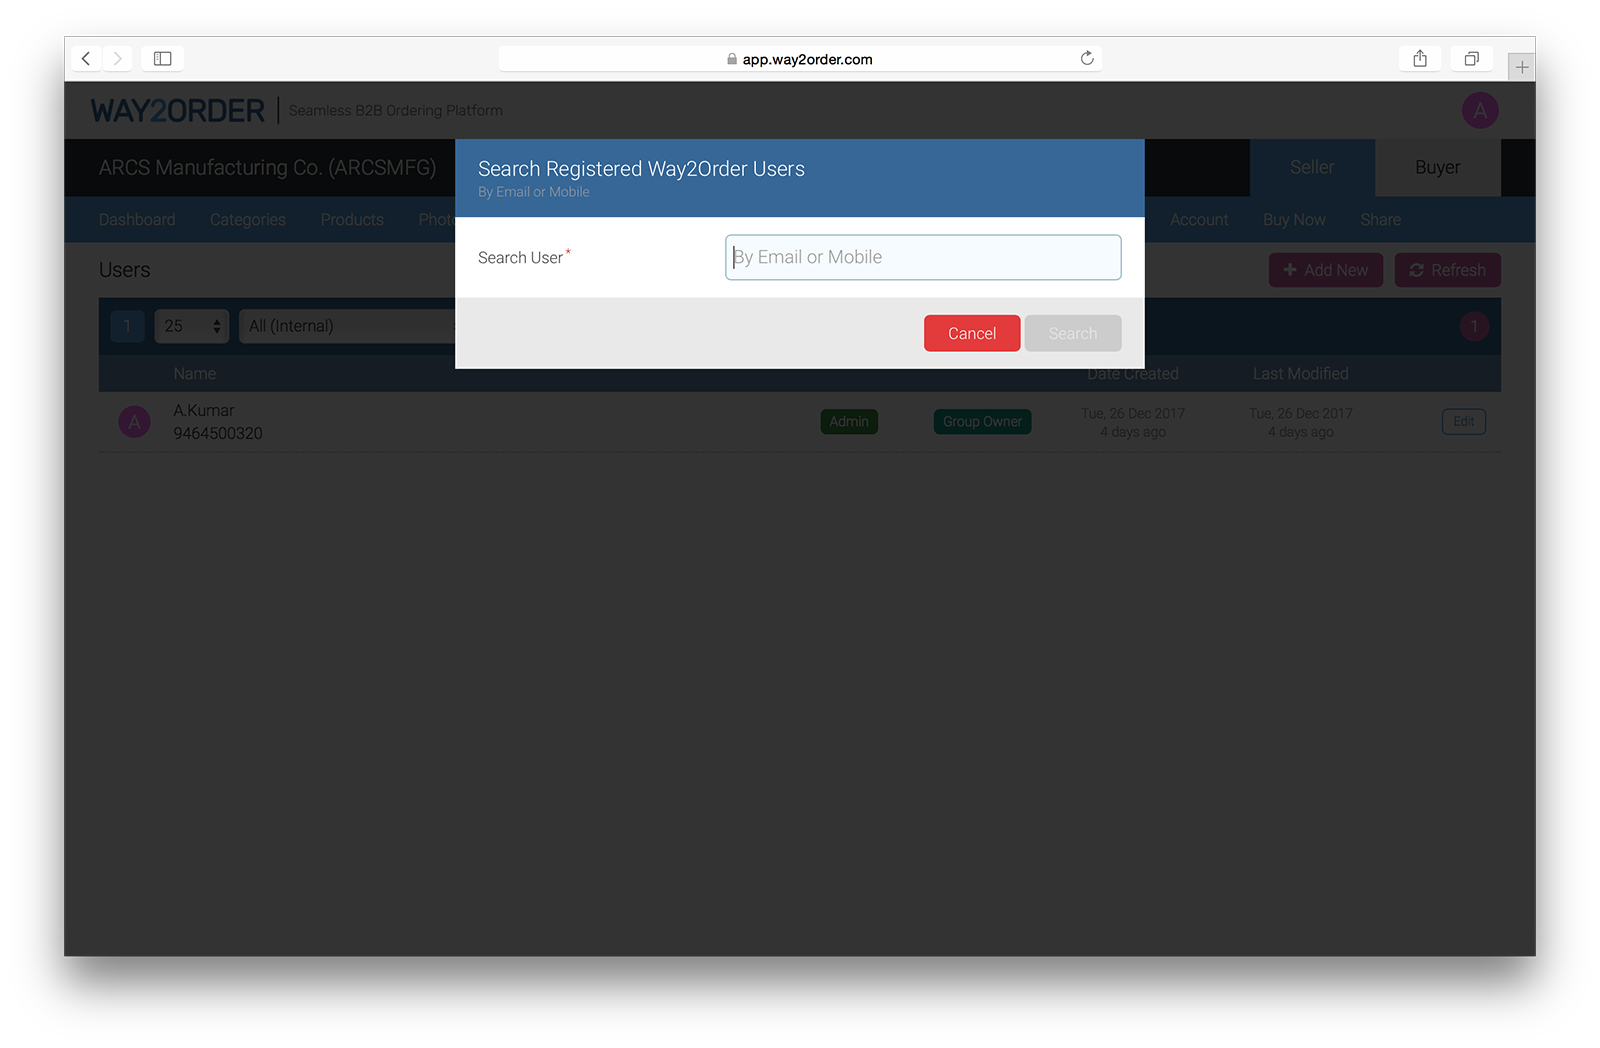
You can now add a 'User' by searching for your colleague or team member with the mobile no. or email address that was used to sign up for Way2Order.
Next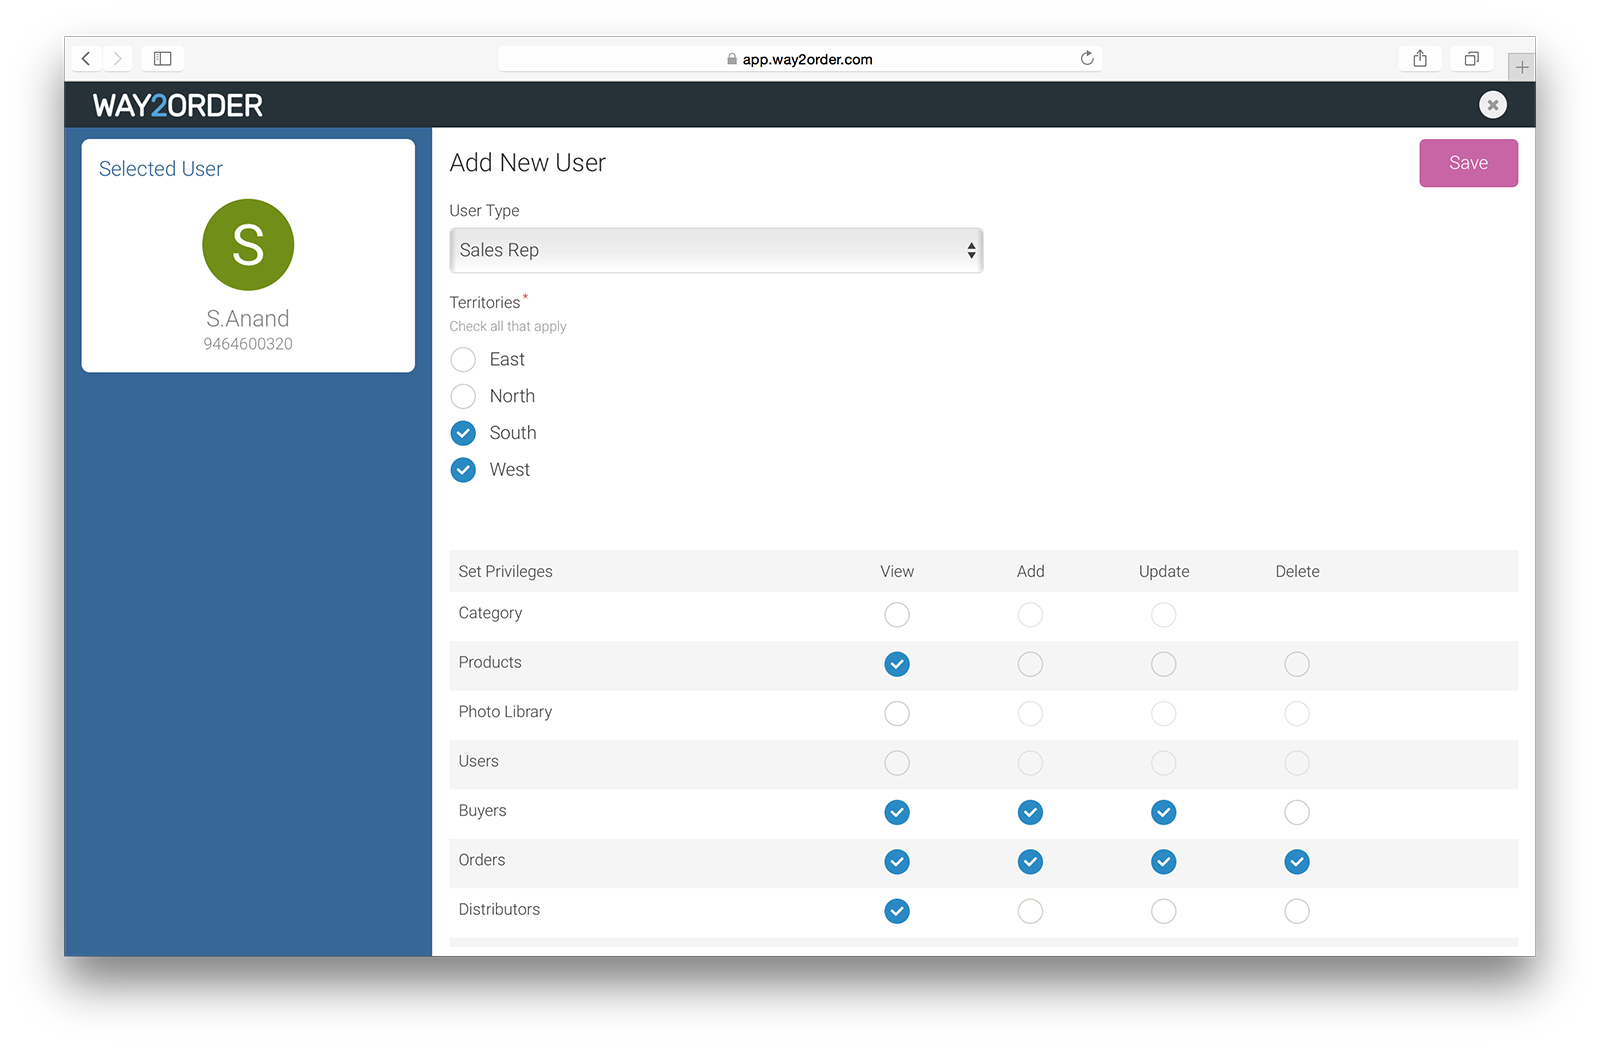
If the search is successful, you should see the user details & will have an option to assign a user role. There are 4 types of users
+ Admin
+ Manager
+ Sales Rep
+ Distributor
You can also define the privileges for each user. When you are done, click save to add the user & send that user a request. An SMS or Email is sent to the user to accept or decline the request.
More Info
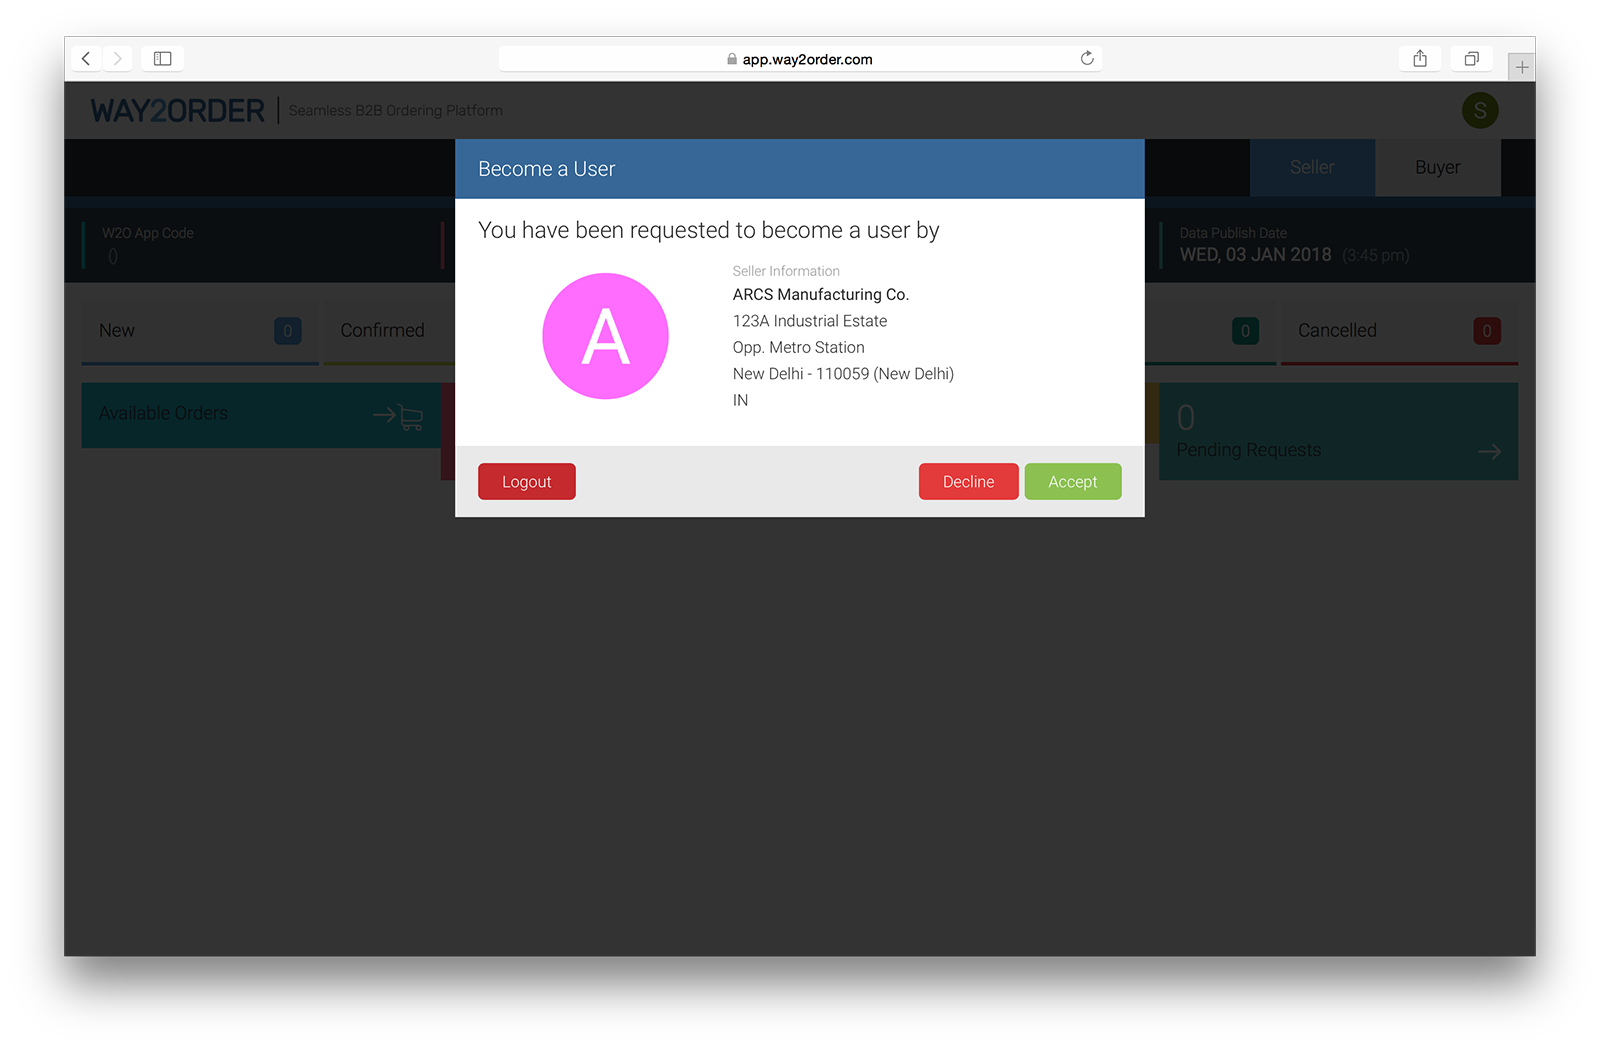
Once a request has been sent to a 'User', a popup dialog shows up on their next login. The user can choose to accept or decline the request. On accepting the request, the user can access that account as per the defined privileges.
Create a Free Account© 2018-2024 Way2Order